prevent basement flooding during heavy rain

5 Steps to Prevent Basement Flooding During Heavy Rainfall

Imagine you're cozied up with a good book, listening to the rhythmic pattern of a heavy rainstorm, when suddenly you notice water creeping into your cozy basement sanctuary. This nightmare scenario is unfortunately all too common for homeowners during heavy rainfall seasons. But fear not, because this horror movie plot can be evaded with some preemptive actions! Keep reading to discover how you can transform your home from a potential indoor swimming pool, back into the safe haven it should be. Hold onto your mops folks, we are diving deep into actionable steps you must take to prevent basement flooding during heavy downpours.

Assessing Your Home's Drainage

Preventing basement flooding during heavy rainfall starts with assessing your home's drainage system. Poor drainage can cause significant water damage to your property, and it's essential to take the necessary steps to address these issues in advance. For instance, consider a case where a homeowner noticed water seeping into their basement during the last heavy rainfall. Upon investigation, they discovered that the gutters were clogged with debris. The stormwater was then collected at the foundation walls, and because of the poor grading around the house's perimeter, water flowed down to the basement. Therefore, inspecting your property's drainage is critical if you want to avoid such scenarios. Start by looking at your home's grading. It should slope away from your house so that surface runoff drains away from your foundation. When soil slopes towards your home, the surface flow tends to pool near the foundation creating hydrostatic pressure on walls and resulting in possible leaks or flooding. You may be tempted to grade towards your neighbor’s house rather than having all surface water routed away through drainage channels or grading. Unfortunately, this may lead to problems on both properties in case of a heavy rainfall event or prolonged periods of rain since backflowing water will enter your neighbor’s yard. Grading around your home's foundation is like erecting a fence along the border of a neighboring farm. It protects both homes from any intrusions from either side while still directing traffic where it is most appropriate. With grading under control let’s concentrate on another part of the drainage system: gutters and downspouts.
  • To prevent basement flooding during heavy rainfall, it is crucial to assess your home's drainage system. Poor drainage can cause significant water damage, and it's essential to take the necessary steps to address these issues in advance. Check your property's grading and ensure that it slopes away from your house so that surface runoff drains away from your foundation. Also, inspect your gutters and downspouts regularly and remove any debris or blockages that may impede water flow. By taking these precautions, you can avoid potential flooding and protect your property from water damage.

1) Optimize Gutters and Downspouts

Gutters are an essential part of any home's drainage system; they collect all rainwater dripping off roofs and direct it safely to downspouts. Properly functioning gutters, coupled with downspouts that divert the collected stormwater away from your home's foundation, are critical in preventing basement flooding. To optimize the effectiveness of your gutters and downspouts, you should consider installing gutter extensions. This way they help route the stormwater even further away from the home foundation where it can’t cause any harm. While shorter extensions can be DIY-ed, longer ones may require a professional to ensure they're installed correctly for maximum effectiveness. In a hypothetical situation where a homeowner doesn't have gutter extensions, their downspouts might only direct water a few feet from their property's walls. When heavy rains hit, water will pool around the foundation, leading to potential leaks or floods. Using large barrels at the ends of long extensions for collecting rainwater may create an unintended consequence: mosquitoes gathering inside stagnant water. However, small placements of bacillus-thuringiensis israelensis (BTI) granules - sold as dunks - which dissolve over time in standing water prevents mosquito larvae from maturing thus controlling mosquito populations while collecting rainwater. Now that we've covered some practical solutions for optimizing gutters and downspouts let’s discuss what else you can do to protect your basement during heavy rainfall events.

2) Evaluate Sump Pump Systems

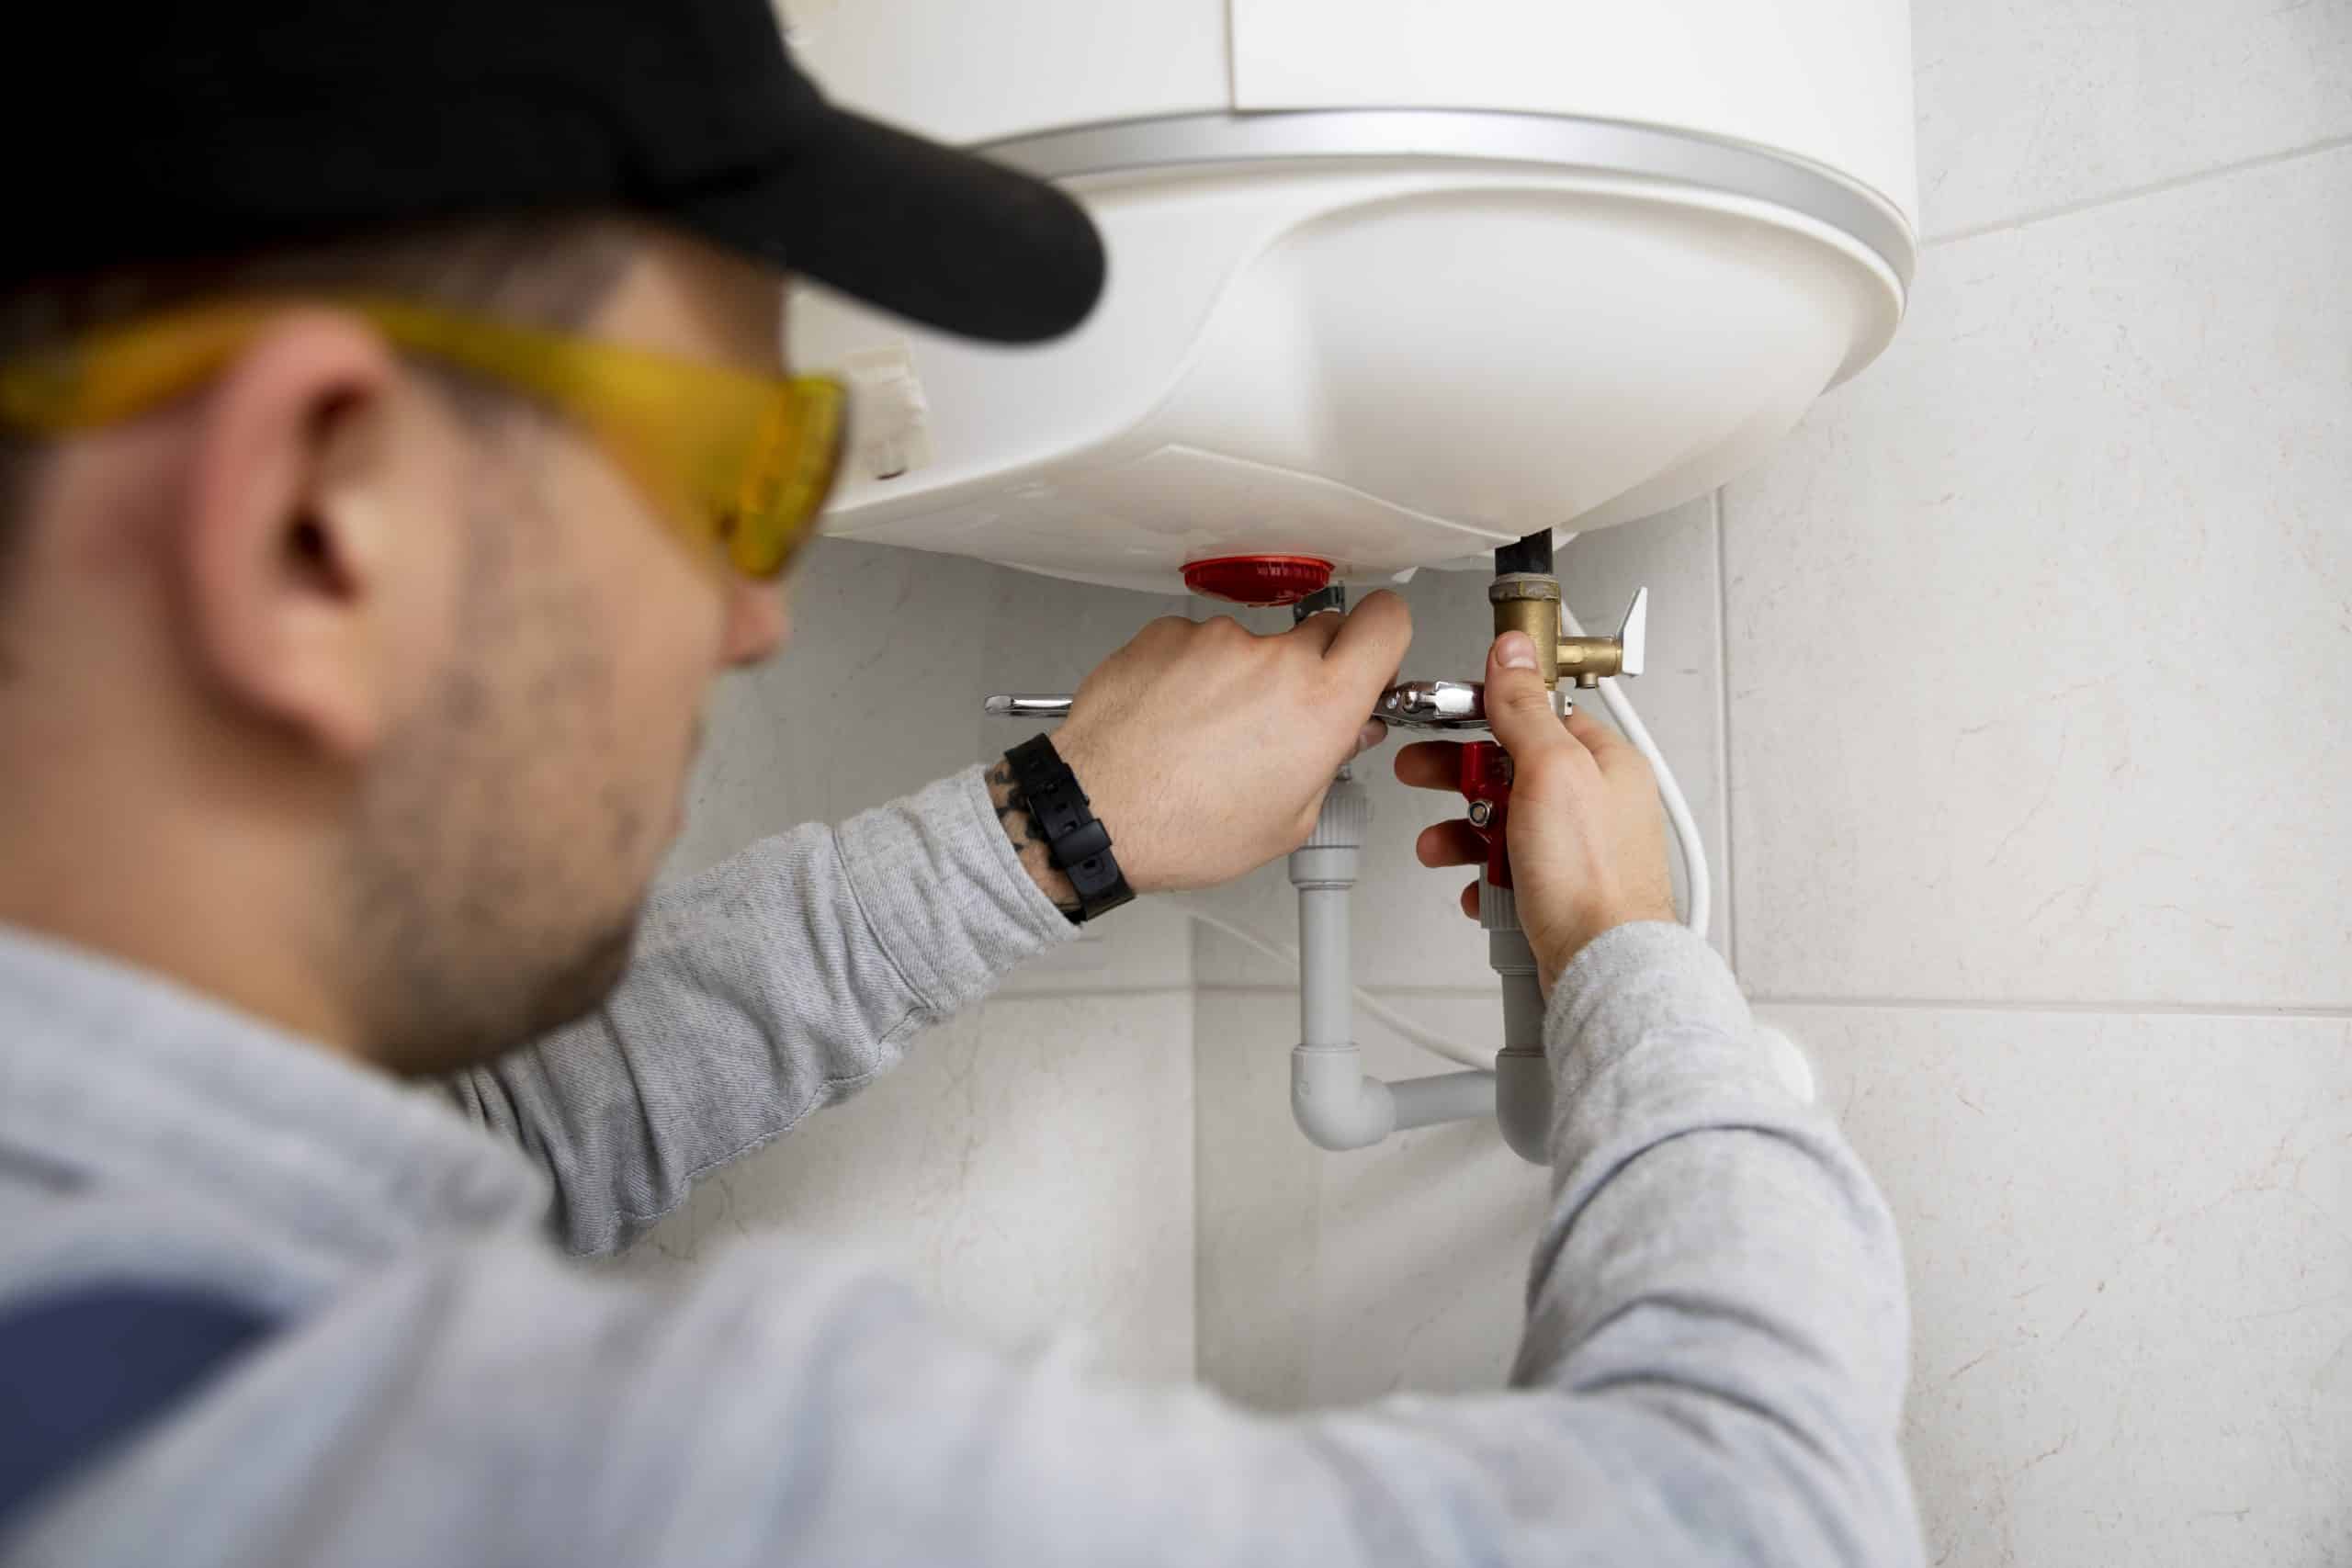
Sump pumps are an essential component of a basement flood prevention system. When water seeps into the basement, sump pumps collect the water in a sump pit and discharge it away from the home to prevent further damage. However, if your current sump pump system is outdated or insufficiently maintained, it may not function correctly during heavy rainfall. If you have an older sump pump that has been installed for more than ten years, it may need to be replaced with a newer model that can handle larger volumes of water flow. Additionally, some homes may have outdated equipment that cannot keep up with modern rain levels. For example, if your sump pump only has a capacity of 1/3 or 1/2 horsepower, it may be best to upgrade to a more powerful model. In case of power loss during a storm, sump pumps should be equipped with a battery-powered backup system. This backup battery feature ensures that the pump can continue working despite power outages that usually accompany heavy storms. If your current sump pump is not fitted with this feature yet, you may need to install one. Installing more than one sump pump might be necessary for larger properties or basements where extra protection is required. A good practice would be having multiple pumps installed in different locations to ensure maximum efficiency in preventing heavy rainwater from causing any damage. Another best practice is conducting regular preventative maintenance checks on your system. This includes ensuring that the float switch activates as intended when water enters into the sump pit, and removing dirt and debris that could clog the pump or discharge line. This maintenance can help avoid any breakdowns during heavy storms and help extend the sump pump's lifespan. When it comes to evaluating sump pump systems, it's essential first to assess their age and type of equipment installed. Upgrading to a newer model with increased horsepower can dramatically improve the system's performance. In addition, providing backup battery power, installing multiple pumps in different locations and regular maintenance checks will improve their functionality by leaps and bounds. Also Read: Effective Troubleshooting Tips for Gas Water Heater Issues

Protecting Your Basement

Protecting your basement from flooding is an essential step for every homeowner. Even minor damages can lead to high repair costs, severe water damage, and unsanitary conditions in your home, and maybe you need to call a professional plumber. Here are some proven ways to protect your basement from flooding. Sealing walls and floor openings is an effective way of preventing water seepage into your basement. This involves identifying cracks in the walls or floors of the basement and patching them up using water-resistant materials like epoxies or hydraulic cement. Repairing foundation cracks should always be done by a professional who can identify the extent of the damage and provide a long-lasting solution. Backflow preventers help prevent sewage backups into your basement through toilets, sinks, and other drains. Essentially, they keep contaminated wastewater from flowing back into the home through connected pipes when sewer lines experience increased pressure due to heavy rainfalls or blocked sewers. Installing these devices may require professional assistance but could save you extensive cleanup along with costly repairs. Keeping drains clear of dirt and debris is crucial for preventing water buildup that could ultimately lead to flooding. Also, ensuring that all sewers are flowing correctly helps reduce the risk of water entering your home through drainpipes or sewage lines. Maintaining or protecting your basement may seem like an overwhelming task, but in the grand scheme of things, taking preventative action can save thousands of dollars in repairs and prevent unwanted health hazards. To achieve this, homeowners should focus on sealing wall and floor openings, installing backflow preventers, and keeping drains and sewer lines clear to protect their families' homes from flooding during heavy storms.

1) Sealing Walls and Floor Openings

When it comes to preventing basement flooding, one of the most important steps is to seal any gaps or openings in your walls and floors. Even small cracks can eventually allow water to seep in, causing damage and potential flooding. An acquaintance of mine once experienced significant basement flooding due to a small crack in their basement wall that had gone unnoticed for years. The cost of repairs and ruined possessions could have easily been avoided by taking the time to inspect and seal the walls early on. Sealing these openings can be done through various methods, including using hydraulic cement or polyurethane injection. These materials are designed to fill all cracks and forms a watertight barrier, preventing any moisture from seeping in. Think of sealing your basement walls and floors like patching up a hole in a boat. If you don't fix the cracks right away, eventually water will start coming in faster than you can bail it out, leading to disaster. Some may argue that minor cracks aren't worth the effort to seal, but even small amounts of water can cause damage over time. Prioritizing the safety of your home from potential flooding is wiser than regretting the consequences later. With your walls and floor sealed tight, let's move on to another preventative measure: backflow valve installation. Also Read: How to Stop a Running Toilet and Troubleshoot Flush Errors?

2) Backflow Valve Installation

A backflow valve is a simple but effective device that prevents sewage from flowing back into your home during heavy rainfall or flooding situations. When heavy rain causes sewer lines to become overwhelmed with water, sewage can start flowing backward through pipes connected to your home, entering through drain systems such as toilets, sinks, and shower drains. By installing a backflow valve in your home's main sewer line, you can prevent any sewage from entering through these drain systems. The valve automatically closes when it senses a reverse flow, keeping your home safe and dry. I had a neighbor who experienced a sewer flooding situation in their basement due to clogged municipal lines during heavy rain, causing significant damage to their property. After installing a backflow valve, they haven't had any similar issues since. Some individuals may question why they should invest in a backflow valve installation if they haven't experienced sewer line issues before. However, it's important to remember that prevention is key, and the cost of installation is relatively low compared to potential damages caused by sewer backups. Also Read: What are the Signs Your Sewer Line is Broken?

Steps to Prevent Basement From Flooding During Heavy Rain

There are several steps you can take to prevent your basement from flooding during heavy rain: 1. Install a sump pump with a battery-operated backup system to keep water in the basement to a minimum. 2. Install a backwater valve to prevent sewage from entering through any other drain in the house. 3. Seal openings in the basement to prevent water from seeping in, and consider contacting a basement waterproofing company for repairs if needed. 4. Properly grade the area around your home's foundation so that water flows away from the house rather than pooling around it. 5. Use downspout extensions or install a French drain to move water away from the foundation safely. Regularly clean gutters or install roof gutter covers to prevent clogs that can lead to basement flooding. By taking these preventative measures, you may be able to avoid dealing with costly repairs and damage due to flooding in your basement during heavy rainfall. Also Read: Why Do I Need a Plumber or Drainage Contractor in Arvada?

Landscaping Adjustments for Water Management

Proper landscaping around your home can work wonders in preventing basement flooding during heavy rainfall. Water flows freely, and redirecting it to a safe area would be the best way to safeguard your basement and prevent water damage. Here are some ways you can adjust your landscaping for maximum water management: Including hardscapes like concrete or paved patios can help manage water flow from downspouts or other potential water sources around the house. Incorporating rocks or stones into a garden area can also aid in providing good drainage. Creating a slope that points away from the foundation of your home towards a lower-end area on your property will allow rainwater to drain off without pooling and seeping into your basement. Some may argue against using mulch as an option because it retains water around plant roots, but mulch actually helps maintain soil moisture levels and prevents soil erosion that can occur by frequent heavy rains. Just like how gutters help control rainwater flow on the roof of a home, tall plants or shrubs strategically placed near the foundation and bordering areas can act as a natural diversion system for managing incoming rainwater. Effective landscaping adjustments should always go hand-in-hand with properly planned grading systems.
  • As per the Federal Emergency Management Agency (FEMA), approximately 98% of basements in the United States will experience some type of water damage during their lifespan.
  • According to the Insurance Information Institute, claims for water damage and mold rank third highest in frequency among all claims made by homeowners, with more than a quarter of these claims being related to basement flooding.
  • The Environmental Protection Agency (EPA) states that preventing water from entering your home by redirecting it away from your foundation can reduce basement flooding risk by as much as 30%.

Soil Grading and Plant Maintenance

The earthwork around your home's perimeter plays an essential role in controlling water flow. When correctly graded, it will make sure that surface runoff won't find its unwanted way into your basement during heavy rains. Additionally, proper maintenance of plants near your home's foundation is key to preventing basement flooding. A thorough inspection of the surrounding soil grade may be required. If needed, you can hire a professional plumbing service to help adjust and grade problematic areas efficiently. Having a compaction test performed on the soil can determine if it is packable or permeable. Overflowing water in your garden, foundation or basement might be caused by improper grading around your house. With a slope that inclines away from the foundation, water will move freely across the targeted drainage areas without flooding your basement.

Developing an Effective Prevention Plan

After assessing your home's drainage and protecting your basement, it's important to develop an effective prevention plan. This plan should incorporate all the preventive measures that you need to undertake to keep your basement safe from flooding. A good prevention plan can help you save time, money, and stress in the long run. To start with, consider your budget. There are many expensive preventive measures to choose from, but not all of them are necessary for your particular situation. Think about what steps will provide the most bang for your buck. For instance, landscaping adjustments or sealing off floor openings might offer more benefits than installing a fancy sump pump system. Next, carefully evaluate each preventive measure you want to undertake. If you're considering adding gutters or downspouts to your home, research different models and brands thoroughly before making a purchase. Look for reviews and recommendations from other homeowners who have already undertaken that specific project themselves. While DIY options may be more cost-effective initially, sometimes it's worth hiring professionals for certain plumbing jobs. Let's take sealing walls as an example - while many homeowners might be capable of doing this themselves, there's a high risk that they won't do it right. In this case, hiring a professional contractor is often the safest bet. Additionally, ensure that the chosen prevention plan accounts for regular maintenance and inspection tasks. Forgetting to clean or check gutters regularly can lead to clogs and eventual basement flooding. Similarly, failing to maintain certain landscaping features can result in issues arising that lead to water damage around the foundation of your home. Think of developing an effective prevention plan like taking care of your health: just as regular exercise and eating a healthy diet can prevent future health problems; taking preventative measures in advance can help avoid potential hazards in the future. To make sure your plan is effective, regularly review and update it. As time passes, environmental factors and other circumstances can change such as the weather or changes in drainage patterns around your home. Leaving those aspects unchecked could compromise the effectiveness of your prevention plan. In summary, developing an effective prevention plan requires both careful consideration of all contributing factors as well as a regular review to ensure the plan remains current and relevant. Taking these steps will help you prevent basement floods and protect your valuable investment!
troubleshooting gas water heater

Effective Troubleshooting Tips for Gas Water Heater Issues

When your hot shower suddenly turns ice cold, it’s a wake-up call nobody wants. Before you panic and run to buy a whole new gas water heater, stop! Often, repairing the already installed unit is much easier and more cost-effective than you'd think. This blog is about transforming you into a temporary plumber, guiding you through an easy-to-follow procedure for troubleshooting your gas water heater. So, grab your tools, and let's unveil the secrets of your mysterious appliance together; after all, who knows? You might just become the unsung hero of your household. Some common problems with gas water heaters include leaks in the gas valves or pipes, sediment build-up inside the tank, and temperature issues. These issues can often be resolved with regular maintenance like flushing the tank to remove sediment, ensuring the pilot light is on and clean, checking gas valve operations, replacing faulty thermocouples, and potentially calling in a licensed plumber in Arvada if the issue persists. It's important to prioritize safety when working with gas appliances, so consult with a professional if unsure or if there appear to be any major concerns.

Identifying Common Gas Water Heater Problems

Gas water heaters are considered one of the most popular appliances for heating water, but they can also have their fair share of problems. It is essential for homeowners to regularly maintain and inspect their gas water heater to ensure it runs smoothly and avoid any costly repairs or replacements in the future. These are a few typical issues encountered with gas water heaters:

1) Sediment buildup in the tank

A major issue that many gas water heaters face is sediment buildup in the tank. Sediment buildup could lead to blockages of the unit’s drain valve or even affect its overall operation, causing it to work less efficiently. This problem often occurs when too many minerals accumulate at the bottom of your water system over time. Scheduling regular maintenance and flushing your gas water heater will help prevent this buildup from leading to a more severe problem.

2) Leaks around the heat exchanger or valves

Another problem you might encounter with your gas water heater is leaks around the heat exchanger or valves. Keep an eye out for water pooling on the floor underneath your unit. Leaks usually indicate a loose fitting or failed seal somewhere in your gas line which needs to be addressed promptly. Avoid dealing with any leaking issues on your own as it could become dangerous and requires a professional plumber's care.

3) Rusty and discolored water 

Rusty and discolored water coming from your taps is not a sign that you should ignore as it could point towards an issue within your gas water heater. Not only does dirty water decrease the efficiency of your system, but rusty pipes can pose health risks such as trace levels of iron and other harmful minerals seeping into your tap supply if left unchecked.

4) Failing temperatures

Lastly, failing temperatures are a significant sign of trouble with your gas water heater. Suppose you've used to consistently hot showers and notice that they suddenly become cooler than what you're accustomed to; it would be best to have your unit inspected immediately by a plumbing professional. Similar to a person experiencing a fever sign, the sudden change in temperature might be due to something minor like a thermostat error or a more severe issue like a broken heating element. Also Read: What are the Signs Your Sewer Line is Broken?

5) Pilot Light Issues

A pilot light is responsible for initiating the process of heating water in your gas water heater. When the pilot light malfunctions, your gas water heater will fail to generate hot water effectively. Noticing that the pilot light has gone out is an important step in diagnosing potential issues with your gas water heater. Insufficient ventilation around your gas-powered units can lead to your pilot light going out repeatedly. A lack of oxygenated air from insufficient ventilation can cause appliances like your furnace or stove and similar appliances without proper venting systems to malfunction as well. If there is enough ventilation around your unit yet you still face recurring pilot light issues, it might be worth checking if there’s any dirt or debris blocking the mechanism that maintains the flame. The thermocouples can also wear out over time and could be faulty and require replacement. While electrical ignition systems tend to be more reliable than traditional pilot lights, they are powered by electricity. This means that power outages or electrical issues could turn off these types of systems easily if there isn't appropriate battery backup storage installed. Nevertheless, they are still good options if you rely on a consistent hot tap supply regularly. Think of your pilot light as the starter motor on your car - it kickstarts everything else along a chain reaction leading to turning your engine on and getting you on the road. Similarly, if there's an issue with your pilot light, this could affect other components within your system such as its valves or heating element. Now that you have learned how to identify common gas water heater problems and how to diagnose various pilot light issues, it's time to move on to the next part of our guide - Navigating Electrical Component Issues.

6) Water Temperature Fluctuations

Water temperature fluctuations can be inconvenient and uncomfortable, especially if you are looking forward to a hot shower after a long day. There are several reasons why your gas water heater may not be maintaining its temperature, including a faulty thermostat, a damaged dip tube, or sediment buildup. For instance, some homeowners have experienced low temperatures in their water heaters because of scale build-up on the heating element caused by hard water. According to The Spruce, the mineral deposits accumulate over time on the electric heating elements and cause them to work harder than necessary. As a result, they corrode earlier than expected and make your hot water supply less effective. Maintaining your water heater is a crucial step in avoiding any fluctuations in temperature. One solution to prevent mineral build-up is regular flushing of the tank. Flushing helps remove sediment and hard water minerals that accumulate over time, improving your heater's efficiency. While flushing the tank is useful in preventing sediment buildup, it may not always help with severe fluctuations in temperature. Before hiring a professional plumber to troubleshoot any issues with your gas water heater, try adjusting the temperature controls on your unit first. Setting the temperature higher on the thermostat can allow for hotter water output but use more energy ultimately resulting in higher monthly bills. Think of adjusting your gas water heater's temperature control as similar to regulating your home's indoor temperature using a thermostat. Just as adjusting the setting to high temperatures during summer months can increase energy consumption usage from the air conditioner, setting your water heater at the maximum output will result in more energy usage for heating your water. If no changes appear after tweaking the settings on your thermostat control pad, check the dip tube inside of the tank next. The dip tube directs incoming cold water towards the bottom, where the heating element can warm it up. Now that you know how to manage water temperature fluctuations, let us discuss an equally crucial aspect of your gas water heater's function: addressing pressure irregularities.

7) Pressure Irregularities

A common problem with gas water heaters is irregular pressure brought on by various issues. Heating units require a delicate balance of pressures to operate efficiently and smoothly. Problems such as leaks in pipes or valves, problems with the relief valve also known as the temperature and pressure valve, or thermal expansion may result in dangerous situations. While high-pressure levels can cause relief valve leaks, low-pressure levels in your water heater's tank can create inconveniences for homeowners. Low pressure impacts the amount of hot water available for use in a single cycle prompting an earlier reheat time, leading to increased energy consumption and inflated bills. If you're experiencing low pressure or no hot water output at all from your gas water heater, there could be more than one explanation. First, check if other faucets around your home are still running cold. Insufficient volume flow to every fixture might suggest a corrosion build-up in the pipe system or problems with the valves feeding into it. Another reason for irregular pressure is any issues with the burner assembly. A typical ignition process involves a continuous flame keeping heat applied evenly throughout the system. If this flame dies out prematurely due to air pollutants clogging up necessary channels or other issues relating to furnace maintenance wear and tear, it causes significant concerns about safety and performance. Think of pressure irregularity like a balloon's inflation level- under-inflate it, risk bursting too quickly but over-inflate it and risk popping a seam. The same applies to your plumbing with proper ventilation required to maintain safe levels for use securely. Since these are intermittent issues, consider having a professional plumber inspect your gas water heater. A full inspection will help identify the root cause of your problems to solve and prevent them from recurring into dangerous or expensive situations. Now that you know details about the problem's potential causes, identification signs, and some of the possible solutions, contact an expert for any concerns with your gas water heater. Also Read: How to Fix a Leaky Bathtub Faucet: A Step-By-Step Guide

Steps to Addressing Mechanical Failures

Gas water heaters have mechanical parts that wear out over time and can lead to malfunction or complete failure. Common mechanical failures include issues with the thermocouple, burner assembly, and control valve. If you suspect a mechanical issue, it's important to troubleshoot and repair the problem as soon as possible to minimize the risk of further damage.
  1. The first step in addressing mechanical failures is turning off the gas supply to the water heater. Next, you should shut off the cold water supply line to the unit. Once you have cut off all sources of power, drain the tank to prevent any residual pressure from building up inside.
  2. At this point, you can perform a visual inspection of all of the mechanical components of your gas water heater. If something appears broken or disconnected, it's time for repair or replacement. Check all fittings and look for any gas leaks. Keep in mind that natural gas is highly flammable, so any issues with fittings or valves must be immediately corrected or turned over to a licensed professional plumber.
  3. If your gas water heater contains a thermocouple that needs replacing due to malfunctions in lighting the pilot light or keeping it lit, purchase a new one at your local hardware store and use manufacturer installation instructions for correct placement.
  4. In some cases, the burner assembly may be damaged beyond repair. In these situations, it may be more cost-effective and efficient to replace the entire unit rather than just one component.
After replacing any malfunctioning mechanical component, turn on the water supply valve and allow time for tank refill prior before reopening gas valve and conducting relighting of pilot light per manufacturer’s instructions.
  • According to the Department of Energy, water heaters account for nearly 17% of a home's energy use, consuming more energy than all other household appliances combined.
  • A report by Statista revealed that in 2020, approximately 8 million water heaters were sold in the United States, indicative of their importance in homes and potential issues arising from wear and tear or poor maintenance.
  • A study conducted in 2013 indicated that improper installation was a significant factor contributing to water heater failures, emphasizing the need for professional involvement in troubleshooting and repairs.
Also Read: Essential Tips for Dealing with a Burst Pipe Crisis

Navigating Electrical Components Issues

Electrical problems with your gas water heater can be more complex than a simple mechanical failure. Electrical failures tend to require an experienced electrician or heating technician since these issues pose significant safety hazards if improperly handled.

1) Faulty thermostat

One of the most common electrical issues with gas water heaters is a faulty thermostat. If your hot water is continuously scalding, lukewarm or cold, you might have a problem with your thermostat and require professional troubleshooting.

2) Malfunctioning high-limit switch

Some electrical failures are connected to the high-limit switch and heating element(s). A malfunctioning high-limit switch can cause overheating or shut-down altogether, while a failing heating element will render the tank completely unable to heat up water.

3) Problems with the wiring

Problems with the wiring such as corrosion or improper connections can also pose serious hazards. If you notice any signs of fraying wires, charred connectors or splices you it's better to turn off power to the unit immediately and hire a professional electrician. As always a quick precautionary measure when dealing with electricity is turning off all sources of power to the unit before conducting any diagnostic testing. Also Read: A Complete Guide to Unclog Sinks & Showers with A Drain Snake

Solving Valve and Pump Issues

Valves and pumps are essential components of a gas water heater. They allow the flow of gas, water, and other fluids in and out of the appliance. However, when these parts malfunction, they can cause significant problems that require immediate attention.

1) Gas valve fails to open or close properly

One of the common valve issues is when the gas valve fails to open or close properly, preventing the flow of gas into the burner assembly. This could happen due to a faulty valve stem or an accumulation of dirt, dust, or debris in the valve housing. A defective gas valve could also cause other issues such as low water pressure or intermittent hot water supply.

2) Pump issues

On the other hand, pump issues usually involve a lack of adequate pressure to deliver hot water through your home's plumbing system. This could be due to a malfunctioning pump motor, worn-out impeller blades, or air trapped in the pump housing. If your gas water heater runs on a well system, you may experience power fluctuations that cause the well pump to underperform. When it comes to repairing or replacing valves and pumps on your gas water heater, there are two schools of thought. Some homeowners prefer DIY solutions involving simple adjustments and basic maintenance tasks like cleaning or lubricating moving parts. Others opt for professional plumbing services that offer more comprehensive repairs and replacements with high-quality parts and labor warranties. While DIY repairs can save you money in the short term, they may not provide long-term solutions that address deeper underlying issues. Moreover, tinkering with valves and pumps without proper training and equipment can be dangerous and pose risks like gas leaks and electrocution. In contrast, hiring licensed plumbing professionals ensures that your gas water heater gets expert-level care that abides by local building codes and safety regulations. Think of your gas water heater as a car engine. Just as you would not entrust an amateur mechanic to repair or replace your engine parts, you should not leave the fate of your water heater's valves and pumps in the hands of inexperienced plumbers. The stakes are too high, and the consequences of shoddy repairs and replacements can be dire.

Sum Up

In summary, solving valve and pump issues on your gas water heater requires expertise, precision, and attention to detail. Whether you choose to DIY or opt for professional plumbing services, remember that safety should always be the top priority.
fix a broken pipe in ceiling

How to Fix a Broken Pipe in the Ceiling in 2023?

Imagine experiencing the shock of a damp patch spreading across your perfectly painted ceiling, or worse, water dripping onto your precious family heirlooms. A broken pipe in the ceiling is no less dramatic than a suspenseful scene from a blockbuster movie! It can disrupt your peace and wreak havoc if not corrected immediately. Before viewing it as a major catastrophe, brace yourself with our candid DIY guide on "How to Fix a Broken Pipe in The Ceiling". By equipping yourself with this vital knowledge, you'll transform from homeowner to home hero in no time! If you have a broken pipe in your ceiling, the first step is to turn off the water and electricity. Next, clear the area of any furniture and place plastic sheeting below the damaged part of the ceiling to prevent further water damage. Then, using safety goggles and a torch, identify the damaged area of the pipe and follow the manufacturer's instructions for using epoxy putty, fiberglass tape or a sleeve clamp repair kit. After repairing the leak, let the area dry completely before repairing the ceiling. If the leak is too big to fix with DIY methods, consider hiring a professional plumber.

Identifying a Ceiling Pipe Leak

Identifying a ceiling pipe leak can be a tricky business, especially if you're not familiar with the plumbing system of your home or commercial building. Water pipes in ceilings can leak due to several reasons such as worn-out joints, loose connections, clogs, and corrosion. Whatever the reason may be, it is important to identify the source of the leak and fix it before it causes any significant damage. One way to detect a leaking pipe in the ceiling is by noticing watermarks on the ceiling or walls. These could range from small dots to large stains that are often brown or yellowish in color. However, not all leaks result in visible watermarks. In fact, some leaks may occur inside an insulation layer and go unnoticed for days or even weeks. Another way to identify a ceiling pipe leak is by using your sense of hearing. If there is a leak in your ceiling, you may hear water dripping or flowing within your walls or above the ceiling. This is more common when the leak is coming from a hot water pipeline. With these examples in mind, it's clear that identifying a ceiling pipe leak can be challenging. To make things easier for you, let's take a look at some common signs and symptoms of pipe damage.
  • The Insurance Information Institute reports that approximately one in fifty insured homes experience a property damage claim due to water damage and freezing each year, indicating the prevalence of such issues including broken pipes.
  • According to HomeAdvisor, the average cost to repair a burst or leaking pipe in the ceiling ranges from $150 to $2,000 depending on the extent of the damage and the complexity of the repair.
  • A study by Roto-Rooter reveals that approximately 78% of homeowners have had at least one emergency plumbing issue, such as leaking or burst pipes, over the past year -It's a frequent issue encountered by numerous homeowners.

Signs and Symptoms of Pipe Damage

Pipe damage can occur due to many factors such as age, wear and tear, faulty installation, climate changes, and pressure-related issues during cold weather conditions. Regardless of the cause, here are some warning signs that tell you when your pipes have been damaged:

1) Brown spots on walls and ceilings: 

As mentioned earlier, brown watermarks that appear suddenly after rain or without any apparent reason may indicate that there is a leaking pipe behind the wall or ceiling. While minor leaks may only leave faint stains, major leaks can leave large spots that grow over time.

2) Discolored water: 

When your pipes corrode or turn rusty, the water that flows through them may be discolored or murky. This could mean that you have a pipe that's rusting out.

3) Low water pressure: 

If you suddenly experience low water pressure in your home or commercial building, it could mean that you have a leaking pipe somewhere. However, low water pressure can also arise due to many other reasons, such as blockages in the line. Therefore, it is important to consult a plumber for further evaluation and diagnosis.

4) Unpleasant odors: 

When sewage lines begin to leak, it can produce foul odors and smells. These odors are unmistakable and usually come from inaccessible areas like under the floors or inside walls. The signs and symptoms of pipe damage vary depending on the type of pipes installed, their age and condition, as well as climatic conditions in the area. Knowing these symptoms will help you identify problems early before they cause significant damage to your property. Also Read: How to Get Rid of a Sewer Gas Smell?

Step-by-step Repair of a Ceiling Pipe

Dealing with a broken pipe in the ceiling can be intimidating, but repairing it doesn't have to be. By following a few simple steps, you can patch up the leak and prevent further damage to your property. First and foremost, before starting any repairs, it's crucial to turn off the main water supply and electricity to avoid electrocution or further water damage. Then, clear the area around the leak of furniture and place a plastic sheet below the damaged area of the ceiling to prevent water from seeping into other areas. If there are water bubbles in the ceiling, drain them before starting work on the pipe. After clearing the area, use a sharp tool like a knife or screwdriver to cut a small hole in the center of the damaged section. Be sure to wear safety goggles while working on the ceiling to protect your eyes from falling debris. Next, use a drywall saw to remove the area around the hole in a square shape. You may need to cut out more than just one section if there is significant water damage. Now that you've removed the damaged section of pipe and surrounding drywall, it's time for repair. Depending on how large or severe the break is, there are several ways to mend it. For small leaks or cracks in copper pipes, you can use epoxy putty as a temporary solution until you can replace the entire pipe. For larger breaks or punctures in copper or PVC pipes, fiberglass tape and sleeve clamp kits are effective at mending holes and preventing future leaks. Think of repairing a pipe like healing an injury. Just like you would clean and sterilize a wound before applying bandages or stitches, it's essential to properly clean out damaged pipes before patching them up. Failing to do so can lead to future leaks and more extensive damage.

Tools Needed and Safety Measures

To avoid complications and ensure proper repair, it's crucial to use the right tools and follow safety precautions when fixing a broken ceiling pipe. Here are some essential tools you'll need for the job. First, have a large bucket on hand to catch any excess water that will pour out when you cut into the drywall. You'll also want to have a plastic sheet or tarp to cover your workspace in case water starts pouring out of the ceiling faster than expected. Additionally, a sharp tool like a knife or screwdriver will be necessary to cut through the drywall and reveal the damaged pipe. Once you've got your hole cut out, safety becomes paramount. To avoid eye injuries from falling debris, safety goggles should be used at all times while working overhead. In addition, cutting through pipes that may still contain pressurized water can cause injuries if not properly secured. A torch can help detect where repairs are needed and provide ample lighting during this part of the process as well. While it's tempting to dive in and start patching up the broken pipe as quickly as possible, don't forget about potential hazards or risks. If you're unsure about how to proceed with repairs or dealing with complex damage, it may be best to call in professional plumbers who can tackle the job safely for you. Just like laceration injuries require specific tools and procedures for successful healing, repairing a broken ceiling pipe requires specific tools for effective maintenance. By using the proper equipment and following recommended safety guidelines, you can avoid further damage from occurring. Armed with this information, you'll be better prepared to tackle ceiling pipe repairs while keeping safety at the forefront of your mind.

Removing the Damaged Pipe Section

Now that you have identified the leak and gathered all the necessary tools and safety measures, it's time to remove the damaged section of the pipe. This step is critical as any remaining damage to the pipe can cause further leaks in the future. To begin with, put on your goggles and use your drywall saw to cut a square or rectangular hole around the leaking area of the ceiling. Make sure you cut along the joists for support and to facilitate easy patching later. An important thing to remember is that cutting too small a hole may result in additional cuts when patching up the ceiling while excessive cutting could lead to weakened joists and increased construction costs. Once you have made a sufficient opening, examine the damaged section of the pipe. If there are any splits or cracks on this section, use your knife or screwdriver to break off this part of the pipe. In cases where there is excessive corrosion or mineral buildup around the damaged pipes, it may be difficult to remove it using a knife or screwdriver. In such instances, consider using steel wool or sandpaper to scrape off all deposits until you get a clean surface ready for repair. After successfully removing all damaged sections, measure how much of a new pipe will be needed as a replacement. Cut this new piece with your hacksaw blade so that it fits snugly between two existing joints using appropriate connectors. Working with plumbing repairs is similar to assembling pieces of a puzzle. It's important that each piece fit together properly with no gaps so that water flows seamlessly through pipes without causing any leaks which may result in water damage issues later.

Patching the Pipe and Ceiling

Patching up the pipes and ceiling is an essential step after removing the damaged section of a pipe. This step ensures that water no longer leaks into the ceiling, causing any further damage. Begin by cleaning out any remaining debris from the surrounding area where you made cuts on both the pipe and ceiling. This will allow for the smooth application of patching material. To fix the new piece of pipe in place, use epoxy or PVC cement to attach it to the already existing joint. Similarly, use another appropriate connector to fit the other end of this new piece to another existing joint. For ease of application, prepare all materials before starting work. Have adhesives ready with approved sealant tape already wrapped around connectors to avoid errors during installation. Once you’re confident that all connections are sealed properly, now it's time to patch up the hole in the ceiling. To begin with, cut out a suitable-sized piece of drywall and hold it against your newly created hole. Then trace its outline so you can easily cut it down to size. Some may debate whether using an exact match or slightly larger than necessary dry-wall patch gives better results. In my opinion, using a slightly larger piece is more practical as it provides more coverage ensuring that patching material will not be visible on some edges compared to using an exact match which may result in mismatched uneven edges and uneven finish. Apply a thin layer of joint compound over edges between wall and replacement drywall until the seam is invisible. Allow for proper drying time before sanding out any bumps or rough spots with a fine-grit sandpaper. Then repaint as needed until the patch blends seamlessly with ceiling finishes. Also Read: Tips for Hiring a Plumber for Home Remodeling Projects

Preventing Future Ceiling Pipe Breaks

Preventing a future ceiling pipe break starts with regular maintenance and upkeep. While accidents happen, much of the time broken pipes can be prevented. Here are some preventative measures you should consider:

1. Insulate Your Pipes: 

Pipes located in unheated areas like attics or basements can freeze and expand during cold weather which can cause them to burst. Ensuring your pipes are properly insulated will prevent them from reaching the freezing point.

2. Clean Drain Pipes Regularly: 

Waste materials can over time build up within drain pipes, cutting down on water flow and increasing pressure inside the pipe. This internal pressure may cause section breaks that lead to more extensive damage over time.

3. Check Water Pressure: 

High water pressure can cause damage to pipes, so it is important to check water pressure regularly. The normal water pressure ranges from 30-60 psi.

4. Do Not Flush Non-degradable Materials: 

Flushing materials like baby wipes or facial tissues that do not dissolve quickly can potentially clog sections of the drain pipe and increase the likelihood of a blockage.

5. Hire Professional Plumbing Services: 

Periodic plumbing inspections conducted by professionals can help identify potential issues before they turn into more severe problems. For example, a plumber may discover a slow leak during routine maintenance that could lead to a significant breakage if it had gone unnoticed for a longer period. By taking these precautions homeowners, landlords and commercial property owners alike can reduce their chances of facing costly repairs due to damaged ceiling pipes.

How to Do Cleaning and Restoration After Pipe Repair?

After fixing the leaking pipe in the ceiling or restoring a broken one, there are several things you must do to restore order before continuing with your day-to-day activities:

1. Clean Up Water Damage: 

While fixing leaking ceilings or broken pipes is important, make sure you address any remaining water damage as well. This includes sanitizing any areas that may have been exposed to water and drying them thoroughly.

2. Repair Ceiling Damage: 

Once you have taken the time to dry out the area, patch up any damaged ceilings using tape, joint compound, sandpaper, primer, and paint. Properly repairing your ceiling will ensure that your structure remains free from mildew and mold.

3. Check for Mold Growth:

Water damage can cause mold growth, which negatively impacts both your health and the structural integrity of your property. After restoring your broken pipe or fixing a leaking ceiling, check for any potential sources of trapped moisture in order to prevent further growth.

4. Start Slowly: 

After completing repairs for either a broken pipe or a leaking ceiling it's important to turn on the water slowly so that you can spot any additional leaks or issues that may have been missed or overlooked during the restoration process.

5. Consider Professional Help with Restoration: 

Homeowners who are faced with significant damages after a leak or break can consider hiring professionals to help restore their property. This can include specialists skilled in water damage restoration or restoration companies specializing in construction projects capable of performing every aspect of ceiling repair. Also Read: Reasons You Might Want to Call an Emergency Plumber

Sum Up

Proper maintenance and regular inspections from your plumbing contractor are crucial when it comes to preventing broken pipes. In addition, addressing water damage and things like mold growth within a reasonable timeframe can prevent much more costly repairs down the line. When dealing with a leaking pipe or broken ceiling, it's important to address any water damage, repair the ceiling, check for mold growth, start slowly to spot any additional issues, and consider professional help if needed. Proper maintenance and regular inspections are crucial for preventing broken pipes and addressing water damage early on can prevent costly repairs in the future.
signs your sewer line is broken

What are the Signs Your Sewer Line is Broken?

Imagine waking up one fine morning in beautiful Arvada to an unexpected, unpleasant surprise - a pungent smell permeating your home, unexplained wet spots on your lawn, or slow-draining sinks. You could just shrug these signs off as minor issues. But what if these aren't simple hiccups in your household operations? What if these are red flags indicating a broken sewer line? Ignoring them could turn that dreamy morning into a plumbing nightmare that'll cost you both your peace and pocket! In this post, we'll guide you through the key signs your sewer line might be busted. With our collective years on the front line of Arvada's homes' plumbing problems, we know a thing or two about diagnosing and battling with broken sewers! Prepare yourself for an intriguing journey into the underground world of your home’s sewage system; it’s going to get dirty! The signs of a broken sewer line include gurgling noises, foul odors, slow draining fixtures, decreased water levels in your toilet bowl, sewage backup in toilets or sinks, and more colorful patches of grass or indentations in your lawn. It's critical to contact a licensed plumber immediately to diagnose and fix the problem before it gets worse and poses health risks. Our team at Local Plumbing Business in Arvada offers both trenched and trenchless sewer line replacement services to address sewer line issues.

Signs Your Sewer Line Is Broken In Arvada

Your sewer line is an essential component of your home's plumbing system, and it's crucial to keep it functioning correctly. However, it's easy to overlook signs of damage until it becomes a much more significant issue. You must be aware of the warning signs of a broken sewer line so that you can get it repaired before it leads to serious problems. Here are some signs that Your Sewer Line Is Broken.

1) Slow Drains: 

If you're noticing that your sink or bathtub is draining slowly, and no amount of plunging seems to help resolve the issue, it could indicate a problem with your sewer line.

2) Water Levels In Toilet Bowl: 

Your toilet bowl water levels should stay consistent unless you flush, but if you notice that the water level is unusually low or high for no apparent reason, it could be because of a broken sewer line.

3) Gurgling Sounds: 

When wastewater flows through your pipes, they can make gurgling noises, which is usually normal. Still, if you hear these sounds coming from your toilet even when no one has flushed recently, it could be a sign that something is wrong with your sewer line.  

4) Lawn Patches: 

Have you spotted an excessively green patch of grass surrounding your sewage pipe? Sewage acts as natural fertilizer for plants, creating lush patches where the wastewater seeps into the soil over time.

5) Foul Odor: 

The smell of sewage isn't pleasant anywhere outside of municipal water treatment plants. Suppose you smell raw sewage around your home even after eliminating potential sources such as backed-up drains or open containers; odors may indicate a problem with your sewer line. Now that you know what signs to look out for let's take a closer look at two visual indicators that often suggest severe sewer line damage. Also Read: How to identify and remove a sewer gas smell

Observing Sewage Backup and Odd Noises

Sewer line malfunction signs range from subtle to severe. Many of these symptoms may suggest not only the presence of sewer backup but also other areas in your plumbing system, such as failed toilets, broken irrigation systems, or simple clogs. However, if you see specific abnormalities happening all around your home that are hard to ignore, this section will detail two red flags that call for an immediate sewer line checkup:

1) Sewage Backup: 

The most obvious sign of a sewer line problem is sewage that backs up into your home through drains or toilets. This situation can cause significant health hazards and should be addressed by an experienced plumbing professional immediately.

2) Gurgling Sound:

 As mentioned earlier, gurgling sounds from a toilet when not being used can indicate a blockage or a buildup in your drain system. It may suggest a more severe issue. Suppose the gurgling happens while draining water in sinks, showers, or bathtubs across different locations in your home. In that case, it's likely that the problem could be within your sewer line itself.

3) Lowered Water Pressure: 

Have you noticed that water pressure coming out of various faucets has been slower than usual? Before you assume that there is a problem with only one fixture or appliance, consider carefully inspecting each one to see if low pressure affects them all. Low water pressure can be more subtle than isolated drain backups, but it's another warning sign of potential problems with your sewer line.

4) Foul Odor: 

Another possible symptom associated with sewer damage is a foul odor. When odor emanates from your sink drains or the area surrounding them and dissipates only to change location frequently through other drainage points within your plumbing system little else smells quite so offensive so consistently. It's critical to remain aware of these signs to avoid more damage in your home. In the next section, we will discuss potential causes of sewer line damage in Arvada, which will help you further understand how and when it's time to get repairs or replacements.
  • Being able to identify the warning signs of sewer line malfunction is important to avoid further damage in your home. Symptoms range from subtle to severe and may suggest other plumbing system issues, but specific abnormalities, such as sewage backup, gurgling sounds, lowered water pressure, or foul odor, should be addressed by an experienced plumbing professional immediately. It's essential to remain aware of these signs and take appropriate action promptly to prevent potential health hazards and protect your home's integrity.

Potential Causes of Sewer Line Damage in Arvada

Several factors can cause significant damage to sewer lines, making it imperative for homeowners to identify potential root causes early enough before the situation gets worse.

1) Inadequate maintenance

One common cause of sewer line damage is inadequate maintenance. Your sewer line requires regular cleaning and inspection to ensure it's functioning as expected. One miss can lead to clogging, which over time can cause significant damage to your pipes.

2) Aging pipes

Another reason for sewer line damage is aging pipes. Sewer lines installed decades ago usually have a limited lifespan due to factors such as wear and tear, susceptibility to erosion, and the building materials used. For instance, older homes may have sewer pipes made of vitrified clay, which tends to crack or rupture as it ages.

3) Extreme weather

Weather patterns can also contribute significantly to sewer line damage. Extreme cold weather causes the ground around your sewer lines to freeze and expand, creating pressure that could crack or shift the pipes. On the other hand, hot weather dries up the soil after prolonged periods of drought leading to potential cracks in the soil around pipes.

4) Tree root invasion

Tree root invasion is another common cause of sewer line damage. Tree roots naturally grow towards sources of water - which makes your sewers an attractive target for them. As they penetrate through a crack or seam in the pipe, they eventually force their way through the surrounding debris and invade your pipeline network entirely. Your sewer system is analogous to your body. Without proper care and maintenance, illnesses are inevitable, from minor coughs and colds to chronic diseases that can prove challenging even for doctors to handle. It's essential for homeowners in Arvada to understand how these causes of sewer line damage can affect their systems' functionality so they can take preemptive measures before significant issues arise.
  • According to HomeAdvisor's surveys, 76% of homeowners experienced symptoms like slow draining bathtubs and toilets, sewage backups, and foul smells before they discovered their sewer lines were damaged.
  • In a survey conducted by Angie's List, about 20% of homeowners reported more vibrant patches of grass over their sewer lines as an early sign of a damaged sewer pipe.
  • The Environmental Protection Agency states that over 25% of American homes are susceptible to sewer line damage due to aging infrastructure, especially those built prior to the 1970s with clay or cast-iron pipes.
Also Read: What is the difference between a drain and a sewer

Inadequate Maintenance and Ageing Pipes

When it comes to the potential causes of sewer line damage, there are several factors that can contribute to this issue in Arvada. Inadequate maintenance and aging pipes are some of the most common reasons why homeowners experience sewer line problems. Over time, mineral deposits, sediment buildup, and tree root invasion can cause pipes to deteriorate and eventually break down. While newer homes may have PVC pipes installed, older homes often have cast iron or clay pipes. These older materials are more prone to cracks, leaks, and degradation as they age. Neglecting routine maintenance such as cleaning your drains or having them professionally snaked once a year can also contribute to sewer line issues. Without proper care, blockages can accumulate and put added stress on your plumbing system, leading to more significant problems down the road. Of course, some homeowners argue that regular maintenance is costly and unnecessary. However, when compared to the price of repairing or replacing a sewer line, investing in routine upkeep can save you money in the long run. With ageing pipes being a significant cause for concern in Arvada's plumbing systems, it is important to know what other factors may contribute to sewer line damage. Below we dive into how weather patterns and tree roots can also play a role in damaging sewer lines.

Weather Patterns and Tree Root Invasion

Another common reason why homeowners experience sewer line damage is due to weather patterns and tree root invasion. In Colorado's volatile climate where temperatures can fluctuate drastically from one day to the next, it's not uncommon for frozen pipes to burst during frigid winter months. Another weather-related factor is heavy rainfall which can flood plumbing systems causing them to malfunction or overflow. Water pressure surges caused by rapid thaw cycles in the spring can also put stress on pipes. In addition to weather patterns, tree roots are another culprit when it comes to sewer line damage. As trees grow and mature over time, their roots can extend deep into the ground, invading pipes and causing blockages or even breaking through them entirely. It's almost like a game of "whack-a-mole" where every time a root is removed, another one seems to pop up somewhere else. While some homeowners may try DIY methods to unclog tree root blockages using harsh chemicals or drain snakes, these temporary solutions can cause more harm than good. On the other hand, some homeowners may argue that they shouldn't have to change their landscaping just to prevent tree roots from damaging their sewer lines. However, it is important to be proactive about this problem rather than waiting for costly repairs down the road. With weather patterns and tree root invasion being significant contributors to sewer line damage, it's crucial to address any potential issues before things escalate. Fortunately, there are several available services in Arvada that can help repair your sewer line efficiently and effectively. Also Read: When to call an emergency plumber?

Importance of Timely Repair in Arvada

A broken sewer line is no minor inconvenience. It can be hazardous to health and can cost thousands of dollars if not addressed immediately. Sewage backups and the presence of sewer gas are two obvious, albeit unpleasant, signs that something is amiss with your sewer line. However, there are other, more subtle indicators of a broken sewer line that homeowners should be aware of. For instance, if you notice abnormal patches of grass or lawn indentations in your yard even when there has been no change in weather patterns, it could indicate a broken sewer line. Delaying repairs will only cause the situation to worsen, leading to further potential damage and expenses. Not all plumbing problems can wait until regular business hours resume. Therefore, quick action is necessary when dealing with plumbing emergencies such as water leaks or damaged sewer lines. If ignored for too long, these issues could compound into a more serious problem. In the case of a broken sewer line, if left unattended for an extended period, the spillage of raw sewage into your home will not only create foul odors but also exacerbate health problems. In addition to putting residents' health at risk, delaying repair work can escalate costs if further damage occurs. Some homeowners may feel that fixing their broken sewer line is an unnecessary expense until they experience sewage backup in their homes; however, it's important to note that you don't necessarily need visible signs of an issue before repairing your sewer line. Do not wait for the situation to get out of hand before seeking assistance. Just like how regular car maintenance safeguards against costly vehicle repairs at some point down the road, proper inspections and routine maintenance early on can help avoid costly surprises in the future and prepare homeowners for any unforeseeable expenses. Now that we understand the importance of timely repairs, let's explore what types of services are available to homeowners in Arvada.

Available Sewer Line Repair Services in Arvada

At our company, we offer both trenched and trenchless sewer line replacement services. Trenching involves digging up the ground to repair damaged pipes. Our technicians use a unique procedure that allows them to remove dirt from the trench carefully, preserving your landscape. Our team undergoes extensive training in heavy equipment operation and follows the highest safety standards, including trench shoring. In addition to sewer line replacements, we offer a comprehensive range of plumbing services to residents in Arvada. From leaky faucets and water heaters to clogged drains and worn-out fixtures, our expert team can handle just about any plumbing issue you encounter.

Sum Up

If you notice persistent sewer issues like slow drains, foul odors, or sewage backups, it could be a sign of a broken sewer line. Don't ignore these warning signs, as they can lead to costly repairs and health hazards. Contact a professional plumber to assess the situation and provide the necessary repairs or replacements. By addressing the issue promptly, you can restore the functionality of your sewer line and ensure the smooth operation of your plumbing system.
Fix a Leaky Bathtub Faucet

How to Fix a Leaky Bathtub Faucet: A Step-By-Step Guide

Can you imagine being at the mercy of a persistent dripping sound in your house? It's incessant echoing through your Arvada home is enough to rob anyone of their sanity. But what if I told you, You’re not helpless! This unrelenting nuisance, often caused by a leaky bathtub faucet, can be tamed, and you won't even need to call in a professional. Dive into our step-by-step guide to fixing that pesky leaky bathtub faucet, and reclaim peace in your home once and for all. Say goodbye to unnecessary plumber fees and hello to self-sufficiency. Our Step-by-Step Guide to Fix Leaky Bathtub Faucet will provide you with detailed instructions on how to repair a dripping bathtub faucet. This guide covers everything from identifying the source of the leak to dismantling the faucet, replacing faulty parts, and reassembling the fixture. Following these steps will help you restore your faucet's function and save you money on water bills. Read About: How to Unclog a Garage Floor Drain?

Locating and Fixing the Valve Leak

A leaky bathtub can be a real annoyance, especially if it keeps you awake at night. Not only is the sound of dripping water irritating, but the constant flow of wasted water can quickly add up to your water bill. Fortunately, fixing a leaky bathtub faucet is a relatively simple process that requires minimal plumbing knowledge and can be done by most homeowners. The key to success is knowing where the leak is coming from. One common source of a leaking bathtub faucet is a faulty valve. Over time, the valve seat can become worn or corroded, causing water to seep through and create leaks. To locate the valve leak, turn off the water supply to your bathroom and then remove the lid from your tub's handle assembly. This will expose the valve seat and allow you to inspect it for signs of wear and tear. Check for cracks, chips or erosion around the edges of the valve seat. If you notice any damage or deterioration, chances are that this is what's causing your faucet to leak. However, before replacing or repairing anything, inspect the washers inside the handle assembly as well. Sometimes a damaged washer can mimic a valve leak by allowing water to flow through the seals during operation. In this situation, replacing these washers may fix your problem without having to replace or repair your entire valve system. Keep in mind that some valve systems are more complex than others. If you have an older home with outdated plumbing fixtures that have not been updated in years, you may discover more than one issue in your bathtub's valve system that needs attention. It may be challenging to diagnose all these issues yourself without calling in an expert plumber.  
  • How can I fix a leaky bathtub faucet step by step?
  • Unfortunately, there aren't many scientific statistics about fixing leaky bathtub faucets. However, here are some related statistics:
  • The Environmental Protection Agency (EPA) reports that household leaks can waste nearly 1 trillion gallons of water annually nationwide, and a leaky faucet dripping at the rate of one drip per second can waste more than 3,000 gallons per year.
  • According to HomeGuide, on average, hiring a plumber to fix a simple faucet leak can cost somewhere between $150 to $350.
  • A study by Milwaukee's Water Works suggests that fixing easily corrected household water leaks like from worn toilet flappers, dripping faucets, or other leaking valves can save homeowners around 10% on their water bills.
  • Fixing a leaky bathtub faucet is important to save you money on water bills and prevent annoying dripping sounds. Homeowners can easily diagnose the issue by inspecting the valve seat and washers inside the handle assembly. However, if the plumbing fixtures are outdated or more complex, it may be best to call in an expert plumber for assistance. Taking action to fix the problem will help ensure your bathtub is functioning properly and efficiently.

Adjusting the Valve Stoppers

If your bathtub's valve leak is caused by a faulty valve, then adjusting its stopper may be all you need to do to fix it. Over time, these stoppers can become loose or worn down, which causes water to flow through the valve system even when the faucet is turned off. This means that even if you've replaced your washers and seals, your bathtub will still continue to leak as long as the stopper remains unadjusted. To adjust your valve stopper effectively, begin by loosening the locknut located around the stem of your bathtub's handle assembly. Then turn the stem counterclockwise until it comes out of the handle. Remove any screws or retaining clips holding the seat tubing in place and gently pull it up and out of the faucet body. You should now have access to the stopper at this point. Think of adjusting a valve stopper like adjusting a clothespin on a washing line. If one side snaps shut too quickly or not at all, chances are that you need to move it slightly until everything evens out. Keep in mind that not all bathtub faucets are created equal. Some models use ball valves instead of traditional stems for water control. In others, adjustment screws might be situated differently or require a specialized tool to reach them. If you're unsure about what type of valve system you’re dealing with, refer to your owner’s manual if available or call a professional plumber. Now that we've covered locating and fixing leaks caused by faulty valves and adjusting your bathtub's valve stoppers let's move onto detaching and replacing a leaking faucet handle. Read About: Fix a Running Toilet & Common Flush Problems & their Fixes

Detaching and Replacing the Faucet Handle

Detaching and replacing a faucet handle can be a tricky task, but with the right tools and techniques in place, it can be accomplished without too much trouble. Before starting the process, it is essential to turn off the water supply to avoid any potential accidents. Once that is done, use a screwdriver to loosen the screws that are located at the center of the faucet handle. The handle should then be tugged gently to detach it from the stem assembly. It is not uncommon for handles to become stuck or difficult to remove due to corrosion build-up over time. If this is the case, it may help to heat up the handle using a hairdryer before attempting to remove it. This will cause expansion and contraction in metal, which can make it easier to pull the handle off. Once you have removed the handle, inspect it closely for signs of wear and tear. Old or worn faucet handles can cause leaks and need replacing. If your handle is still in good condition, then move on to examining the stem assembly. In some cases, you may need a special valve puller tool to remove the stem assembly from the faucet body after removing the retaining nut. However, if you do not have this tool, you may try gently wiggling or twisting the stem until you can carefully pull it out by hand. Like with any other type of device repair project, having patience and taking care during each step of the process is key. A hasty approach could lead to accidental damage and more problems than solutions.

Techniques for Stubborn Handle Removal

Stubborn handles can be a challenge to remove, but with the right techniques, you can get rid of them without damaging your faucet. One such technique is to apply a little heat to the handle using a heat gun or hairdryer. This can cause metal expansion that may loosen the handle enough for it to be removed. Another option is to use a special handle puller tool, which can be found at any local hardware store. A handle puller will grip onto the faucet handle and pull it off with ease, making the removal process quick and straightforward. If neither of these methods work, try applying penetrating oil around the base of the handle and waiting for several hours before attempting to remove it again. The oil will work its way into any crevices and loosen any rusted or corroded components that may be causing the handle to stick. It's always helpful to have an extra set of hands when working on plumbing projects, so don't hesitate to enlist a family member or friend if you're having trouble with stubborn handles. In some cases, you may need to replace the entire faucet if the faucet handle cannot be removed. However, this is typically only necessary if severe corrosion or wear and tear has caused damage that is too extensive to repair through normal means. Some homeowners may wonder if they can simply apply brute force to remove their stubborn handles. However, this approach can lead to more problems than solutions – parts can break under too much strain or you could damage your fixture beyond repair. Remembering that patience is key and trying out different methods in a calm way is often going to be most effective when dealing with tricky plumbing repairs. With these techniques in mind, tackling stubborn handles should no longer seem like an insurmountable task! The next step in fixing your leaky bathtub faucet will take us through addressing the valve seat nut and replacing any worn-out parts.

Addressing the Valve Seat Nut

One of the parts that is often responsible for a leaky bathtub faucet is the valve seat nut. The valve seat nut connects the spout to the plumbing system and if it becomes worn out, it can cause water to leak through. To address the valve seat nut, you will need a specific set of tools, which includes an adjustable wrench, pliers, a screwdriver, and possibly a specialized seat wrench. Begin by turning off the main water supply to your home and opening up the faucet handles to release any leftover water in the pipes. Next, you will need to remove the cap on top of the faucet handle using either a flathead screwdriver or pliers. Once removed, unscrew the handle from the stem and carefully pull it off. Expose any screws around the base by lifting up any rubber or plastic gaskets. Now it's time to access the valve seat nut. You may find that it is difficult to reach due to corrosion or tight spaces. If this is the case, try using an extended socket wrench, otherwise use an adjustable wrench. Grasp onto the valve seat nut and rotate it counterclockwise until it detaches. It’s essential that you don’t damage any surrounding areas while handling this component with caution since fixing damages caused by over-tenting could be much more expensive than repairing a leaky faucet. To avoid scratching or cracking fixtures when removing the valve seat nut, be sure not to overtighten while reinstalling it. Once replaced, check that there are no visible dents or warping as this can prevent other new components from sealing correctly. A high concentration of minerals can accumulate over time between any materials in contact with water; scrape away grime build-up and lime deposits that have lodged under any washers. With these crucial steps addressed, we can now move on to discussing important tools that you’ll need to complete the repair.

Required Tools

Before beginning any plumbing repair, it is essential to have the right tools on hand. Fixing a leaky bathtub faucet might seem like an easy task, but without proper equipment and expert know-how, the work can become difficult or even hazardous. Here are some tools needed for fixing a leaky bathtub faucet:

1. Basin wrench 

This wrench is specifically designed for loosening or tightening nuts and bolts of sink fixtures that are not easily reachable with other tools.

2. Adjustable wrench  

These versatile tools can adjust to various bolt sizes by turning a knob.

3. Channel locks 

Channel-lock pliers provide additional leverage and help with grip when working in hard-to-reach areas such as under sinks or behind walls.  

4. Screwdrivers 

A flathead screwdriver could be useful for prying off handles of faucets while a Phillips-head screwdriver will come in handy when removing screws from mounting brackets.

5. Lubricant 

Plumber’s grease helps prevent corrosion and sticking of moving parts, ensuring they remain intact over time.

6. Seat wrench 

Sometimes valve seats corrode due to mineral buildup, requiring replacement which necessitates specialized seat wrenches. Think of these tools as your trusted helper when performing a task: Selecting the right tool for the job is integral to accomplishing everything effortlessly with no frustration or complications. The use of incorrect tools can result in further damage to piping systems, leading to expensive replacement costs in the long run. If you’re unsure about how to fix a leaky bathtub faucet or lack the appropriate tools on hand, consider consulting an experienced plumber before setting out to undertake it yourself.

Applying Sealant and Final Adjustments

Once you have replaced the washer, stem assembly, and valve seat nut, it's time to ensure that your bathtub faucet will no longer leak by applying a sealant and making final adjustments. First, apply the plumber's tape to the threads of the stem assembly. This tape will help prevent any future leaks from developing. Next, carefully reinsert the stem assembly back into the valve body. Make sure to turn it clockwise until it is tightly secured in place. Now it's time to reattach the handle. If you had to remove any corroded parts during the repair process, now might be a good time to give them a quick clean before reinstalling. Use your screwdriver to re-attach the screws in the center of the handle. Give them a final tighten so that the handle is secure. Finally, turn on the water supply and test out your faucet. Take note of any drips or leaks that may still be present. If there are no signs of leaking, congratulations! You have successfully fixed your leaky bathtub faucet. On the other hand, if there are still drips or leaks present after reassembly, there may be another underlying issue with your faucet that needs addressing. It could be an issue with your plumbing system or water pressure. In this case, it would be best to call in a professional plumber to diagnose and fix any other issues that may be present.

Conclusion

Fixing a leaky bathtub faucet can be compared to changing a tire: while changing a flat tire may seem daunting at first, with some guidance and practice it becomes second nature. Similarly, repairing a leaky faucet may seem like a daunting task but with this step-by-step guide, you'll become more comfortable handling small plumbing repairs around your home. Fixing a leaky bathtub faucet not only saves you money on your water bills but it also helps conserve water. By following this step-by-step guide, you will be able to fix your own bathtub faucet quickly and efficiently, without having to call in a professional plumber. Remember to take your time during the repair process and if any issues arise, don't hesitate to call in a plumbing expert for assistance.
Do I need a Plumber or a Drainage Contractor

Why Do I Need a Plumber or Drainage Contractor in Arvada?

Imagine you're washing the dishes after hosting a dinner party, and suddenly, the water stops draining properly. Panic sets in as water fills your sink faster than you can bail it out, creating a cascading waterfall onto your kitchen floor. Is this an issue for a plumber or a drainage contractor in Arvada? Don't worry! We've got the answers for you in this comprehensive guide on deciding who to call when faced with clogged drains, and why the difference matters more than you think. This depends on the specific issue you are facing. A plumber can typically handle issues related to leaky pipes, water heaters, and general plumbing maintenance. Alternatively, a drainage contractor specializes in installing and repairing drainage systems used to control water runoff. If your issue is related to water buildup or flow control, hiring a drainage contractor may be the better option. However, if your issue involves fixing leaks or clogs within your pipes or fixtures, then hiring a plumber would be more appropriate. In any case, visiting our website for home-maintenance updates and advice will give you an edge should such issues arise in your home.

Identifying Plumbing and Drainage Issues

Plumbing and drainage issues can be a nightmare, especially if they go undetected for too long. Identifying the problem early on can help you avoid bigger, more costly repairs down the line. As a homeowner in Arvada, it's important to have some knowledge of which issues require the expertise of a plumber or a drainage contractor. For instance, if you've noticed your sink is draining slowly or there's a gurgling sound coming from the drain, this could be a sign of a clog in your pipes. It's best to call in a plumber who can assess the situation and clear out any blockages to prevent water from backing up into your home. On the other hand, if you've noticed standing water in your yard or driveway, this could be indicative of a drainage issue. A professional drainage contractor should take a look and determine the best course of action to prevent further damage to your property. In order to know whether you need a plumber or a drainage contractor, let's explore some common signs that indicate each specific issue.

Signs that You Need a Plumber

As mentioned earlier, plumbing issues should not be ignored as they can lead to water damage, mold growth, and other types of structural damage. Here are some signs that indicate when it's time to call in a professional plumber: According to Mark Johnson, owner of Johnson Plumbing Services in Arvada, “Some common signs that you need a plumber include low water pressure, leaks, burst pipes, a running toilet, and dripping faucets”. Low water pressure can indicate an obstruction in the plumbing system or even tree roots growing into your main line. Leaks can cause structural damage over time and create health hazards due to mold growth. Burst pipes are a plumbing emergency and require immediate attention to prevent extensive water damage. Some homeowners might be tempted to try and fix these issues themselves, but it's important to note that DIY plumbing can often lead to bigger problems down the line. Not only can you cause further damage to your plumbing system, but you can also put yourself at risk of injury or even make the issue worse. In the next section, we'll explore signs that indicate when it's time to call in a professional drainage contractor.
  • Plumbing issues such as low water pressure, leaks, burst pipes, running toilets, and dripping faucets should not be ignored. DIY plumbing may cause further damage to your plumbing system and put you at risk of injury or even lead to bigger problems down the line. It is crucial to call in a professional plumber to prevent extensive water damage, mold growth, and other types of structural damage.

Indications You Need a Drainage Contractor

Drainage issues can cause significant problems in your home or commercial property if left unaddressed. Some drainage problems can be fixed with simple DIY solutions, but some will require the help of a professional drainage contractor. Here are some indications that you need to seek the services of a drainage contractor in Arvada: First and foremost, if you notice standing water on your property or around the foundation of your building after heavy rainfall, it is a clear sign that there is an issue with drainage. This could be due to improper grading, clogged gutters, or damage to the downspouts. Additionally, if you notice any water stains or mold growth on walls or ceilings, it could indicate that there is an issue with water seepage or leaks in the drainage system. In such cases, it is crucial to call a licensed drainage contractor immediately. Another indication that you need a drainage contractor's services is if you notice pooling water around your property's perimeter during heavy rainfall. This could be a sign of an underground pipe breakage or clogging, which requires professional inspection and repair. Some homeowners may attempt to address these issues by themselves for fear of spending money on professionals' services. However, attempting DIY approaches without proper expertise could make the problem worse and result in costly repairs in the future. It is vital to understand that drainage issues are not always visible and can lead to severe damage over time if left untreated. Ignoring such issues now is like sweeping dirt under the carpet; eventually, it will accumulate and cause more extensive property damage. Now that you know when to seek the services of a drainage contractor, let us examine how professional plumbing compares to drainage services in Arvada.
  • According to the U.S. Bureau of Labor Statistics, in 2021 there were around 490,000 plumbing and pipefitting jobs, with approximately 13% of these professionals working as contractors specializing in drainage systems.
  • A 2020 study published in the Journal of Construction Engineering and Management found that approximately 75% of plumbing and drainage issues can be resolved by general plumbers, while more complex issues may require a specialized drainage contractor.
  • The Arvada Public Works Department states that proper maintenance of residential drainage systems can help prevent flooding issues; however, when larger issues arise, such as blockages or damaged pipes, 60% of cases require the expertise of a dedicated drainage contractor.
Also, Read About: A Complete Guide to Unclog Sinks & Showers with A Drain Snake

Professional Plumbing vs. Drainage Services in Arvada

Drainage issues can range from minor inconveniences to serious structural damage. It's important to know when it's time to call in a certified drainage contractor. Here are some indications that you may have a drainage issue: According to Matt Johnson, owner of Johnson Drainage Services in Arvada, “Standing water in your yard or driveway, damp crawl spaces or basements, and erosion around your property’s foundation are all signs that you may have a drainage issue.” Standing water in your yard or driveway can indicate poor grading and drainage, which will lead to mold growth, mosquito infestations, and other health hazards for you and your family. Damp crawl spaces or basements can lead to unpleasant odors and weaken the structure of your home. Erosion around your property's foundation compromises its stability. A drainage contractor is like an architect for your yard - they design, build and maintain a system that works seamlessly with Mother Nature to keep your property healthy. Comparing Expertise and Service Offerings While plumbing and drainage contractors both deal with water systems, their services are different. Plumbing professionals mainly install and repair the water supply and distribution systems around your property. On the other hand, drainage contractors focus on installing, repairing, and maintaining drainage systems to ensure proper water management in your home or commercial property. For instance, a plumber would be suitable when you need to fix a clogged toilet, replace a sink faucet or install a new showerhead. Conversely, if you require a French drain installation, sewer line system inspection, or foundation waterproofing, it is best to call in a drainage contractor. Additionally, professional drainage contractors possess specialized skills and equipment for dealing with complex drainage issues such as stormwater management. They also have an in-depth understanding of local regulations concerning stormwater drainage plans and permits. While some homeowners may feel that they can handle minor plumbing or drainage issues on their own using DIY techniques found online, it is safer and more cost-effective to hire qualified professionals instead of taking risks with do-it-yourself (DIY) attempts. Such DIY projects may lead to bigger problems that may cause more damage to your home. Plumbing and drainage system operations are vital for the comfort, health, and safety of homes and commercial properties' occupants. Failure to perform regular maintenance or seek professional services when required can result in costly repairs in the future. Also Read About: Benefits of Hiring a Licensed Emergency Plumber

Finding a Certified Plumber or Drainage Contractor in Arvada

When it comes to plumbing and drainage issues, both plumbers and drainage contractors have their own areas of expertise and specific service offerings. It's important to understand the differences between the two in order to determine which professional is right for your specific problem.

1) Plumbers

Plumbers possess exceptional expertise and specialization in effectively installing, repairing, and maintaining plumbing systems. They have in-depth knowledge of pipe systems, water flow, and all types of fixtures. Plumbers can handle a variety of issues, such as clogged drains, leaky faucets, burst pipes, and more. They also have the necessary tools and equipment to diagnose problems quickly and provide effective solutions. Also Read About: Tips for Hiring a Plumber for Home Remodeling Projects

2) Drainage Contractors

On the other hand, drainage contractors specialize in problems related to drainage systems specifically. They are experts in identifying problems with sewers, stormwater systems, or grading around the foundation of homes. Drainage contractors can help identify the cause of poor drainage on a property or yard, work with appropriate grading methods or even install French drains if necessary. Each profession offers unique services that often overlap somewhat but also differ depending on each situation. For example, if you have a leaking toilet or sink that is causing water damage in your home, a plumber would be the best professional to call. A leak like this requires examination and usually needs immediate attention. On the other hand, if you're experiencing significant standing water outside your home after rainstorms then hiring a drainage contractor could offer you a better solution than other options available. It's worth noting that some plumbing companies do offer drainage services that can include drain cleaning or waste removal using different tools like hydro jetting or cable snaking. Ultimately, choosing whether to contact a plumber or drainage contractor often depends on the specific issue at hand. But homeowners should always consider expertise and the scope of services offered before making a decision on whom to call.  

Tips for Selecting the Right Professional

No plumbing or drainage issue should be left to DIY actions, as they often cause further damage and cost much more when attempting to repair later on. So, how can you find the right plumber or drainage contractor for your problem? To start with, look for referrals from people whom you trust such as friends and family who have had similar problems in their homes before. Look up reviews online verify the company has verified positive feedback and Accreditation Ratings if any are provided by trusted sources like BBB. This can provide confidence in selecting a reputable company in Arvada that will be able to solve issues effectively and efficiently. Choosing the wrong professional for your problem is similar to visiting a dentist when experiencing chest pain- it's simply not their area of expertise. Make sure whichever professional is selected has experience in working with similar issues before taking them on board for repairs. Once you've made a shortlist of plumbers or drainage contractors, schedule consultations and ask questions about their services and rates. Make sure they provide a detailed breakdown of service offerings so that you can choose the most appropriate company according to your specific needs. Be sure that the plumbers and contractors you interview all have requisite certifications, licensing, and insurance coverage. In addition to verifying credentials, also verify that the prices quoted match industry standards or are within reasonable ranges by asking professionals within these industries. When searching for a contractor consider what payment plans are provided, how confident they are in their repairs (via guarantees or warranties) and work timeframes to completion in order to minimize the inconvenience of any repair or maintenance. Finding the right plumber or drain contractor requires research, recommendations from trusted sources, pricing calculations, and attentive vetting. Take your time and ask questions before making a decision.

Risks of DIY Plumbing and Drainage Solutions

When it comes to plumbing and drainage issues, it's always better to call in a professional rather than attempting to fix the problem yourself. However, selecting the right professional can be challenging, especially if you've never hired one before. Here are some tips to help you select the right plumber or drainage contractor in Arvada:

1. Look for Experience: 

The first thing you should look for when selecting a plumber or drainage contractor is experience. A reliable professional will have years of experience fixing similar problems.

2. Check for Licenses and Certifications:

Always choose a licensed and certified professional who has the appropriate certifications according to Arvada regulations.

3. Read Reviews: 

Online reviews can be a great resource when trying to find a reputable plumber or drainage contractor.

4. Ask for References: 

Do not hesitate to ask for references from previous clients as this can help determine their quality of work.

5. Get Multiple Quotes: 

Do not rush into hiring the first professional you come across. It’s important to get multiple quotes from different professionals. Doing so allows you to compare prices, services, and warranties that each one offers.

6. Confirm Insurance Policies: 

Lastly, make sure that any plumber or drainage contractor has insurance policies confirmed with service agreements and warranty documents. John ran into an issue with his plumbing system at home and needed a reliable plumber as soon as possible. He took time doing his homework upfront by going through online directories, checking reviews of several contractors and looking up ratings on comparison websites that track consumer satisfaction levels and feedback about various businesses in Arvada area. Hiring any professional without doing prior research can lead to less effective results and more frustration, causing more damage even after spending thousands of dollars on plumbing issues that could have been resolved using professional help sooner or properly assessed with licensed experts’ intervention. Some homeowners choose to do their own plumbing and drainage repairs instead of hiring a professional. While DIY solutions may seem like a more affordable option, they can often lead to even bigger problems. If you are not confident in your skills, a DIY solution is not recommended. In the same way we rely on trained and licensed professionals when it comes to complex car issues or medical procedures, the same should be applied to complex plumbing and drainage problems where knowledge, professional tools, and expertise are required.
Things You Should Do When You Find a Burst Pipe

Essential Tips for Dealing with a Burst Pipe Crisis in Arvada

Imagine waking up on a chilly winter morning, only to find that your cozy Arvada home has transformed into a soggy mess: water everywhere, damp furniture, and a ticking clock before the damage gets any worse. This domestic nightmare is unfortunately all too real for many homeowners when they discover their home has fallen victim to a burst pipe. In moments like these, quick thinking and immediate action are key to protecting both your home and your wallet. Get ready to equip yourself with the essential knowledge and strategies you'll need when facing off against one of every homeowner's worst nightmares: the dreaded burst pipe. If you discover a burst pipe in your Arvada home or business, the first thing you should do is shut off the main water valve. Then, contact a licensed plumber immediately to assess and repair the damage. Taking quick action can help prevent further damage and significant expenses. Additionally, document the damages as soon as possible for insurance purposes.

Shut Off the Water Supply

If you find a burst pipe, your first priority is to shut off the water supply to prevent any further damage. This should be done as quickly as possible before evacuating your home or calling for professional help. Turning off the water supply valve can protect your home from extensive water leaks that are expensive and time-consuming to fix. Imagine that you have a burst pipe in your basement, and gallons of water are cascading into your living room. If you don't know how to turn off the main water supply, then you are more likely to panic and waste time searching for answers while your home suffers from water damage. Although turning off the water supply is a simple process, it can be challenging if you don't know where the main valve is located. Moreover, some valves may be difficult to access, so it's essential to identify them before an emergency occurs. Think of turning off the main water supply as putting out a fire. In both cases, quick action is required to minimize damage. Just as firefighters need to locate the source of a fire and put it out completely, homeowners should quickly locate their main water valve and shut it down.  

Locate Your Home's Main Water Valve

Locating the main water valve in your home is critical to minimizing water damage due to a burst pipe or any other plumbing emergency. As mentioned earlier, knowing what you should do during an emergency is one thing, but knowing where everything is located is another. An Arvada homeowner once suffered significant property damage because they took too long trying to turn off the main water valve that was hidden behind multiple obstructions in their crawlspace. Think of locating the main water valve as preparing for a lightning storm. Knowing what areas in your home are most vulnerable to lightning strikes and preparing accordingly, e.g., by protecting electronics and making necessary repairs, helps ensure you don't lose power during a storm. Similarly, identifying where the main water valve is located can help you protect your home from burst pipes and leaks. Additionally, if you have ever had to call an Arvada plumber during an emergency, one of the first questions they usually ask is if you have been able to turn off the main water supply. If you don't know where it is located, this can be costly and frustrating, adding more delay to resolving the emergency. While some Arvada homeowners may understand that their main water valve is located outside their home or in their basement. Now that we have highlighted why locating your home's main water valve is essential, you can read about How to Unclog Your Home Drains in Arvada

Assessing the Damage

If you are dealing with a burst pipe in your Arvada home, the initial panic may prevent you from thinking clearly and assessing the damage properly. However, it's important to take a few moments to evaluate the situation before taking any action. By assessing the damage promptly, you can minimize the impact of the burst and take immediate steps to prevent further damage. For instance, if you find yourself with a burst pipe in your basement, you should perform a quick assessment of its location and the extent of water damage. You might also want to check for any signs of mould growth or structural damage that can further decrease the stability of your home's foundation. Quick action during such situations is vital in preventing more severe damages from occurring. Therefore, start by examining all visible components surrounding the pipework, as there may be other damages that have gone unnoticed. After shutting off the water supply, it is critical to assess the damage accurately. Depending on how fast you notice the issue or how severe it is, it may not always be easy to spot the initial source of the problem. Think about a ship hull damaged by a sudden impact below sea level. Just like a ship taking on water, when a pipe bursts in your home, water will escape continuously until it is controlled. It's no secret that time is key in situations like these where every second counts. One question that homeowners often ask themselves is whether they need professional help to assess for damages. In most cases, it would be best if you call an expert plumber who has dealt with similar issues before, but if you want to save money and attempt repairs yourself, then there are some things that you could consider: Firstly, dry out dripping water: Water running down walls and along ceilings poses additional dangers even after turning off the water supply. This increases the risk of developing electrical problems and a substantial weakening of ceilings. Secondly, look out for any visible cracks or leaks on the walls or ceiling surfaces. Thirdly, check if there are any electrical outlets or light switches nearby. Mopping up puddles can help prevent these devices from shorting out and creating additional hazards. Remember to shut off all electrical circuits that may have gotten wet before conducting an assessment. Now that you've successfully done a damage assessment, you can read about A Complete Guide to Unclog Sinks & Showers with A Drain Snake

Identify Affected Areas and Leakage Source

Start by finding the location of the burst pipe and carefully isolating all valves surrounding it. Turning off the main valve may also be crucial if you're unsure which line is damaged, although make sure you know where each open/close valve is located inside your house. If you can't find interior damage caused by water right away, follow the trail and look for signs of moisture throughout your household. The key places to check for damages include utility areas like your basement or garage, main water lines, sprinkler heads, hose bibs outside of your home, as well as kitchens and bathrooms with sinks. Similar to air conditioning ducts in large commercial settings, water pipes throughout your house distribute fluid through their small openings. Any breaks or leaks in these pipes can cause serious problems since they will keep spilling until they are fixed. Wrapping Up... Remember, when it comes to burst pipes, time is of the essence. Whether you decide to fix things yourself or call an Arvada plumber, acting promptly will reduce further damage and save you money in the long run.

Clean-Up and Drying Process

Once you've shut off the water supply and identified the source of the leak, it’s time to focus on cleaning up the damage. A burst pipe can cause extensive water damage, leaving behind a mess that needs to be cleaned up before any repairs can begin. Speed is of the essence in this situation, as prolonged exposure to moisture can lead to mold growth, which brings with it many health problems. First things first, start by removing any standing water using buckets or a wet/dry vacuum. Make sure to wear protective gear like gloves and boots during this process, as there may be debris and contaminants mixed in with the water. Once all the excess water has been removed, it’s time to start drying out the affected areas. Towels and blankets can be used for smaller areas while larger spaces require industrial-strength fans and dehumidifiers. Some homeowners may consider letting their carpets air dry after a flood or burst pipe, but this is not recommended. Carpets are highly absorbent and prone to attracting mold spores if they're not dried quickly enough. Professional carpet cleaning services have specialized equipment that can effectively remove excess moisture from carpets, preventing mold growth. Furniture should also be removed from the affected area to facilitate faster and more thorough drying. Wood furniture could warp or become damaged when it comes into contact with moisture for an extended period of time. Placing aluminum foil beneath furniture legs can prevent them from absorbing residual moisture.  

Remove Debris and Prevent Mold Growth

Once your home is dry, it's important to remove any debris left over after the burst pipe incident. This could include anything from broken glass and splintered wood to mud and dirt that was brought in with the water. It’s important not to handle any hazardous waste yourself or without proper gear. Instead, contact local waste management services for safe disposal. Once all debris has been removed and disposed of, it's time to start thinking about mold prevention. As we mentioned earlier, mold growth can pose serious health hazards and affect the structural integrity of your home by eating away at drywall and ceiling tiles. To prevent mold growth, either a solution of bleach and water or a commercial cleaning product can be used to sanitize affected surfaces. If you decide to use bleach, measure it carefully and properly dilute it according to the instructions on the bottle. Be careful though, excessive bleaching could damage surfaces. Remember that even if you can’t see mold or mildew, it may still be growing inside your walls or other hidden areas of your home. To make sure you have peace of mind after a burst pipe incident, you may also want to consider hiring a professional mold-remediation service. By following these steps for cleanup and mitigation following a burst pipe incident, you can save yourself time and money in the long run. Don't hesitate in taking action fast when in such situations – act immediately.
  • Proper cleanup and mitigation after a burst pipe incident is crucial for preventing mold growth and protecting your home from further damage. It's important to remove debris safely and thoroughly, sanitize affected surfaces with bleach or a commercial cleaning product, and consider hiring a professional mold-remediation service for hidden areas of your home. Act quickly and take the necessary steps to save yourself time and money in the long run.
Also, Read About: Do You Need a Plumber for Bathroom Remodeling Services?

Professional Help and Repairs

When it comes to fixing a burst pipe, it's important not to try and handle the repairs yourself. Even if you're handy around the house, the damage caused by a burst pipe can be severe, and there are many potential hazards associated with repairing it. Hiring a professional plumber is always the best move. One reason why it's important to seek professional help is that most homeowners don't have the tools necessary to fix a burst pipe. Specialized equipment such as press tools, soldering torches, and metal cutters are often required to properly fix a broken pipe. Attempting to use these tools without the proper training can result in injury or further damage. Another factor that makes hiring a professional plumber critical is their expertise in identifying underlying issues that may have led to the burst. Often, pipes may have become weakened over time due to various factors such as age, corrosion or wear and tear. A professional plumber will not only be able to make the necessary repairs but also diagnose any other related issues that may cause future problems. Many homeowners may think that hiring a professional is too expensive, especially after having already dealt with water damage from a broken pipe. However, hiring an experienced and licensed plumber can actually save you money in the long run by preventing further damage or complications that could occur from improper repairs. It's like going to the doctor – you wouldn't try to diagnose and treat your own illness without proper knowledge and tools. Similarly, attempting DIY repairs on your plumbing system without expertise can result in further harm and financial stress. Now that we've covered why hiring a professional plumber is important when dealing with a burst pipe, let's dive into when exactly you should call them for help.
  • According to the Insurance Information Institute, frozen and burst pipes are the second most common cause of home insurance claims in the United States, with an average cost of $10,000 per claim.
  • The EPA states that a single burst pipe can release over 200 gallons of water per day, causing significant water damage and potentially leading to mold growth if not addressed promptly.
  • In a study from the Water Research Foundation, it was found that homes with copper pipes have a higher risk of experiencing burst pipes than those with plastic piping materials like PEX or CPVC, which can better withstand freezing temperatures.

When to Call an Arvada Plumber

It's important to call a plumber as soon as you suspect that your home has a burst pipe. The earlier you catch the problem, the better it will be for your wallet and your safety. Below are some indicators that it is time to call in professional help:

1) Obvious Signs of Damage: 

If you notice water seeping through walls, pooling on floors, or if you can hear water running even though all faucets are turned off, then it is likely that there is a burst pipe in your home. In such cases, don't hesitate to call an Arvada plumber right away.

2) Decreased Water Pressure: 

Even when there are no obvious signs of damage, decreased water pressure in certain areas of your home can indicate a hidden leak due to a burst pipe. A professional plumber can conduct a detailed inspection of your pipes and diagnose the issue quickly. Some homeowners may want to try and wait out the damage rather than calling in a plumber right away. However, it is crucial to remember that the longer you wait, the more extensive the damage can become. For instance, if left unattended for too long, standing water from a broken pipe can cause mold growth within 24-48 hours. And if mold does take hold, it could pose serious health risks to those living in the home down the line. Waiting to seek professional help with a burst pipe is like waiting for a cavity to heal without going to the dentist—it just won't happen.

Conclusion

In conclusion, preventing burst pipes in Arvada is possible with proper insulation and maintaining a consistent temperature within the home. Moreover, taking caution regarding plumbing usage and checking appliances regularly for damage will reduce the possibility of needing expensive repairs due to damaged or burst pipes.
How To Unclog a Garage Floor Drain

How to Unclog a Garage Floor Drain in Arvada in 2023?

Picture this: It's a beautiful summer day in Arvada, Colorado; the sun is shining bright, and you've decided to tackle cleaning your garage over the weekend. With all your supplies ready, you notice water pooling on your garage floor - a sign that your garage floor drain is clogged! A clogged drain can hinder all your plans to keep that clutter-free, pristine garage you've always envisioned. But fear not! In this step-by-step guide, we'll walk you through the process of unclogging a garage floor drain like a pro, swiftly getting you back on track for that dream organization project. To unclog a garage floor drain in Arvada, you can first try using a plunger or plumbing snake. If those methods do not work, it may be necessary to call a licensed plumber to help clear the blockage. It's also important to regularly maintain your drains to prevent future clogs from occurring.

Understanding Garage Floor Drain Clogs

Garage floor drains play a crucial role in ensuring your garage stays dry and free of any standing water. Nevertheless, despite their usefulness, these drains can become clogged over time, leading to stagnant water on the floor. Understanding the causes of garage floor drain clogs is crucial to facilitate their easy unclogging and prevent the problem from reoccurring. One of the most common reasons for clogging is debris accumulation. Over time, dirt, sand, rocks, and other waste materials carried by cars accumulate around the drain cover or flow into the drainpipe. Additionally, because garages often serve as both storage and work areas, tools such as sawdust, screws, bolts, and nails may also find their way into the drainpipe and block it. Another major cause of garage floor drain clogs is tree root intrusion. Trees growing close to the garage can extend their roots toward moist areas such as drains seeking water and nutrients. These roots grow through cracks in the pipes and start obstructing water flow, causing backups. Some people may claim that pouring grease down the drain is not a primary cause of clogging - after all, it's liquid too. However, they are wrong! Grease may appear in liquid form when hot but solidifies upon cooling or exposure to cold temperatures. The accumulation of this greasy solid over time restricts water flow into the pipes, causing backups. A garage floor drain clog can be likened to a traffic jam; where vehicles pile up behind each other due to congestion in one lane leading to a standstill on all other lanes. The 'vehicles' in this instance are water molecules that cannot move freely due to physical obstructions inside the pipe. In the next section, we will look at some of the specific causes of garage floor drain clogging in Arvada.

Causes of Clogs in Arvada

Arvada, like most cities, has its fair share of unique environmental and socioeconomic factors that predispose its residents to garage floor drain clogs. Understanding some of these individual factors will help you take the necessary steps to prevent them. Arvada is an area with many mature trees, which means homeowners need to be extra vigilant about tree root intrusion. These roots tend to grow faster in moist soil environments, particularly those that remain damp for long periods and are much more likely to penetrate older pipes that are already cracked or worn out. Another factor peculiar to this area is the prevalence of garages with sloping floors. These sloping floors make it easy for debris to accumulate at the lower end of the drain cover since they require less force to move debris from the edges towards the drain. Additionally, since most cars parked in garages follow a similar slope, these drains are continually exposed to various dirt and waste materials. Some individuals might argue that insects like spiders and ants cannot cause clogging since they are small creatures compared to the size of pipes. However, they can still contribute significantly to the accumulation of debris in drainpipes by collecting debris around the pipe opening and carrying it into the pipe. The causes of clogging in Arvada's garage floor drains can be analogous to why people get sick. People living in urban areas may be more vulnerable as compared to those residing in suburban or rural settings due to pollution levels and crowd density. In a similar vein, if your garage is situated next to large trees or on a sloped surface like those common with homes located near hillsides or slopes' bases, there is an increased risk of experiencing clogs. Overall, understanding what causes blockages is essential in preventing future problems. With a comprehensive understanding of what could cause clogs, you can take the necessary steps to avoid them and keep your garage's drain clear. In the next section, we will look at the necessary tools and equipment to tackle these clogs.

Gathering Necessary Tools and Materials

Before we dive into the actual process of unclogging a garage floor drain, it is crucial to gather the necessary tools and materials first. Trust me; you don't want to start with the unclogging process only to realize halfway through that you're missing a tool or two. This can be incredibly frustrating, not to mention time-consuming. Let's start with the basic tools needed to unclog a garage floor drain. These include a pair of rubber gloves, a bucket, a plunger, a hand snake or auger, and safety goggles. You may also need some cleaning supplies like bleach, vinegar, or baking soda. Now let's talk about each of these tools in detail. Rubber gloves are necessary to protect your hands from the dirt and grime that come with cleaning drain pipes. They also provide a better grip when handling slippery items like the plunger or hand snake. A bucket is essential to catch any water that may come out during the unclogging process. It will also help keep the area clean and mess-free. When it comes to plungers, there are different types to choose from - the cup plunger and the flange plunger. The cup plunger works best for flat surfaces like sinks, while the flange plunger is better suited for toilets and curved surfaces. However, either type of plunger can work for unclogging a garage floor drain. Think of a hand snake or auger as a mini plumbing system you can use yourself. It's basically like having an electrician's snake without spending hundreds of dollars on professional services. Now that you have all of your tools and materials ready, it's time to move on to the next section and start unclogging your garage floor drain!
  • According to a study conducted by the National Environmental Services Center, up to 93% of clogged drains are caused by excessive grease, hair, and other debris accumulation.
  • The United States Environmental Protection Agency (EPA) reports that approximately 80% of drain clogs can be resolved without using harsh chemical drain cleaners, which can be harmful to pipes and the environment.
  • A survey conducted by Plumbing Manufacturers International (PMI) found that over 40% of homeowners experienced at least one clogged drain issue per year, with garage floor drains being among the most common areas affected.
Also Read: How to Unclog Your Home Drains in Arvada

Step-by-Step Unclogging Guide

Unclogging a garage floor drain can be a messy and smelly process, but it's essential to keep your drain in good working order. Here's a step-by-step guide on how to do it correctly. The first step is to remove any debris or gunk that may be blocking the drain entrance. You can use your hands or a small shovel to do this. Once you've removed any visible blockages from the surface, it's time to proceed with using your tools. Start with the plunger - place the cup over the drain and add enough water to make sure it covers the rubber part. Begin moving the plunger up and down vigorously, creating suction, which should help break up any clogs within the pipes leading away from the garage. If a plunger doesn't work, move on to using a hand snake or auger. Gently insert the snake into the drain until you encounter a slight resistance. Begin cranking the handle clockwise, pushing it forward until you reach the clog. Try turning it counterclockwise if you encounter any initial resistance. For tougher clogs, mix equal parts baking soda and vinegar in a bowl. To ensure proper drainage, pour the solution down the drain and allow it to sit for 30 minutes. Afterward, flush the drain with hot water continuously. Think of your garage floor drain as a prehistoric animal sleeping underground that needs some sleep disruption! By putting pressure or inserting an auger, you're waking that animal up and forcing it out of his bed (the pipe)! Now that your garage floor drain is unclogged, it's essential to take preventative measures to minimize the risk of future clogs. Let's move on to the final section next!
  • To unclog a garage floor drain, start by removing any visible blockages and using a plunger or hand snake or auger. For tougher clogs, mix baking soda and vinegar and let it sit for 30 minutes before flushing with hot water. Once you've successfully unclogged the drain, take preventative measures to minimize future clogs. Regular maintenance will save you from messy and smelly experiences in the future.

1) Blockage Removal Techniques

Having identified the possible reasons for clogs in Arvada, it is now time to move on to the next step: blockage removal techniques. There are several methods that you can use to remove blockages and unclog your garage floor drain. Here is the complete detail. Firstly, you can try using a plunger. While most people associate plungers with toilets, they are actually quite effective at unclogging floor drains as well. Fill the affected area with enough water such that the plunger is fully submerged and then apply pressure using an up-and-down motion. The suction created will help dislodge any clogs and allow water to flow freely again. Secondly, you can opt for using a snake or plumbing auger. Snakes are long, flexible wires that are inserted into pipes to clear out blockages. Once inserted, they can be rotated manually or by using an electric motor that helps drill through stubborn blockages. Be sure to wear gloves and eye protection when operating a snake. Additionally, you can use baking soda and vinegar to dissolve some types of blockages. Mix equal parts white vinegar and baking soda and pour it down the affected drain. Let this sit for a few minutes before following up with warm water. The chemical reaction between the two substances produces carbon dioxide, which helps loosen blockages. If these DIY methods don't work or if you'd prefer professional assistance, do not hesitate to call a plumbing specialist in Arvada. They have specialized tools like video camera inspections that help pinpoint stubborn blockages and remove them effectively. In my personal experience, I had a stubborn clog in my garage floor drain that could not be cleared by plunging or homemade remedies like baking soda and vinegar mixture. In such instances, it's best to seek professional help as soon as possible before the problem worsens. These blockage removal techniques have been tried and tested, with thousands of homeowners recording success stories. You can trust that one of these methods will work for you unless the clog is caused by an underlying problem like broken pipes. Some people argue that using chemical drain cleaners is another effective method of unclogging blocked drains. While this may be a tempting option, it's not recommended because the chemicals used to dissolve clogs can corrode pipes, causing long-term damage to your plumbing system. Having removed the blockages, it’s time to move onto the next step in our garage floor drain unclogging guide: rinsing and finishing steps.

2) Rinsing and Finishing Steps

Once you've successfully removed the blockages from your garage floor drain, it’s time to clean up and ensure it’s operating smoothly again. Here are some effective tips: Start by running hot water down the drain to help loosen any remaining debris that could be lurking in the pipes. A few minutes worth of this should suffice. Next, use a wet-dry vacuum cleaner or a towel to dry up any residual water. Ensure you remove all remaining water as dampness encourages mold and mildew growth, which will lead to bad odors in your garage. Finally, deodorize the entire area by pouring vinegar down into the drain followed by warm water. This will help neutralize any unpleasant odors left behind after unclogging your floor drain. In my personal experience, I couldn't quite get rid of some unpleasant smells that lingered after successfully unclogging my garage floor drain. Fortunately, I didn't give up and eventually found out that deodorizing with vinegar and warm water was an effective solution. Following these steps helps restore proper flow in your garage floor drains while also reducing blockage risks in the future. Imagine a clogged sink that’s been unclogged. While it may look clean, there could still be remaining dirt and build-up. Rinsing ensures that everything is clean and clear, leaving your sink (and in this case, garage floor drain) entirely unclogged. Now that your garage floor drain is functioning optimally again, let's move on to the final step: preventative tips and maintenance.  Also Read: How to Get Rid of a Sewer Gas Smell in Arvada?

Preventative Tips and Maintenance

Preventing a clog in the first place is always more beneficial than dealing with one after it has already happened. You can take several preventative measures to keep your garage floor drain running smoothly. Begin by setting up regular maintenance checks at least once a year. A professional plumber can inspect your drain and clean it thoroughly, removing any buildup that could have otherwise caused a clog. Another simple step towards preventing garage floor drain clogs is to place a filter or mesh screen over the drain's opening. This will stop debris from entering and blocking the drain. Ensure to remove any buildup on these filters regularly to prevent them from becoming blocked themselves, thus resulting in water backing up into your garage. Additionally, be mindful of the type of items you are storing near the drain, as this is a factor that people often overlook. Avoid stuffing nearby shelves or storage units too full of objects, and try to position drying mats underneath bikes, lawnmowers, and other machinery since they may drip with oil or gasoline. If you have noticed that your garage floor drain clogs frequently due to hair, grease or soap scum, then consider trying an enzyme-based cleaner that breaks down organic matter developing inside pipes without causing any harm to the surrounding environment. An acquaintance of mine realized that her garage door was getting stuck because of a clogged floor drain in her Arvada home. She had been parking her car just outside the garage instead of inside it so she could avoid driving through standing water on the ground. But when it rained heavily one day, she saw water building up all around her car parked outside. Upon investigating, she realized that it was seeping out of the garage through the gaps beneath the door panels which signalled that something was amiss with her floor drain. The plumber who attended her case advised her to install a screen over the drainage opening to prevent debris from blocking it in the future. Moreover, he recommended she schedule regular plumbing checks to ensure the system was always functional. Some people assume that pouring chemicals like bleach down the drain regularly will help prevent clogs. While this approach may help clear out minor build-ups, it has a broader impact on the environment and could lead to more long-term problems with your pipes. When washing grease or oil down your garage floor drain, you only contribute to blocked pipes, so it is best to collect excess food debris in a grease trap instead of washing them down the drain. Think of it as taking care of yourself; you don't wait for feelings of pain or discomfort until you see a healthcare professional. Instead, preventative measures such as eating healthy and exercising are taken daily to keep health issues at bay. Now that we have gone over some preventative tips you can also read about: How to Stop a Running Toilet and Troubleshoot Flush Errors?

Minimizing Clog Risks

The first step towards minimizing clog risk is being cautious when flushing things down your toilet: only human waste and toilet paper should be flushed. Avoid placing items like sanitary pads, wipes, and cotton swabs in the toilet bowl because they can cause blockages in both your drainage pipes and sewer line that can result in messy backups. Secondly, ensure that large amounts of hair never go into your shower or bath by installing bathroom floor mats with suction cups beneath them. These mats collect hair before they reach the shower or bathtub drain, preventing water buildup inwardly Every time a member of your household takes a shower or bath, remind them to remove any hair from these mats. Lastly, avoid pouring harsh chemicals like caustic soda down any drains because they cause pipe corrosion which can shorten their lifespan. It's important to remember that while quick chemical fixes might seem attractive at first, avoiding those will always lead to better long-term results. My friend's sister lives in Arvada, and she once accidentally dropped a ring down the sink when doing dishes. Unfortunately, it was lodged deep inside the pipes, rendering all her in-house clogs worthless. She had to call a professional plumber who addressed the situation by taking apart the plumbing system to retrieve the ring. The plumber discovered that even small bits of food debris can cause significant blockages if allowed to accumulate over time. This experience reminded us how even the smallest objects can cause a domino effect that results in costly plumbing repairs. Some homeowners like using plungers or hydro-jets when faced with a backed-up drain as a quick fix rather than calling professionals, but this approach never lasts long-term because some clogs are often out of reach and more problematic than others. Using DIY hacks also puts you at risk of causing pipe damage since they use too much pressure, which can eventually cause them to crack. You cannot always prevent a clog issue from happening, just as you cannot predict when you might get sick. Nonetheless, through preventative care such as adopting good practices and regular maintenance checks, you can minimize problems before they escalate into serious situations. Thank you for reading this Step-by-Step Guide on How to Unclog a Garage Floor Drain in Arvada. Keep your drains healthy!
When Do You Need a Plumbing Permit?

When Do You Need a Plumbing Permit in Arvada?

Whether you're a first-time homeowner or a building contractor, it's easy to understand how plumbing permits can be a confusing and intimidating subject in Arvada. With various types of permits, to different levels of complexity involved in obtaining them, it can be hard to know where to start. Fortunately, we’ve got you covered. In this blog post, we will explore all you need to know about plumbing permit requirements in Arvada. We’ll provide an overview of permits that are required for different projects, give you the inside scoop on what kind of fees you should expect, as well as tips to make the process of obtaining permits a breeze.

Plumbing Permits in the City of Arvada

In the City of Arvada, many types of plumbing projects require a permit. The regulations governing these activities vary depending on the scope of work. Homeowners who plan to install or replace fixtures, such as toilets, faucets and water heaters, must obtain permits before starting work. Similarly, owners of commercial establishments may have to get approval from their local municipality in order to make plumbing repairs or remodel existing systems. Obtaining a permit helps ensure that the quality and standards set by the municipality are met. Homeowners should be aware that most building codes in the city require an accredited plumber to do the job and all installations should meet recommended standards for longevity and efficiency. It is important to ensure that water works properly within the home and does not damage property or create safety hazards so that you do not have to call an emergency plumber in Arvada. On the other hand, it is understandable that some people may view applying for a permit as a time-consuming and costly affair. The process can add additional delays if you are looking to accomplish a job quickly. Furthermore, fines can be quite expensive if one were to make alterations without approval from the relevant authority. It is therefore highly advised to look into what permits are required so one remains legally compliant when making any changes involving plumbing within your residence or business establishment. Doing so will also help provide peace of mind, which goes hand in hand in making sure everything runs smoothly. With that said, however, knowing who needs a plumbing permit is just as important a consideration as understanding what permits are necessary. Also Read: How to Identify and Remove a Sewer Gas Smell

Who Needs a Plumbing Permit?

Most cities, including Arvada, require a plumbing permit for most home plumbing projects. Generally speaking, if a project requires fittings or specific equipment that alters the existing water and/or drainage system of the home or building, then a permit will be required. This means any remodeling involving new faucets or fixtures, piping or altering the current setup of any drains or water lines need to be approved before beginning. The question is: who needs to obtain such a permit? The answer depends on a few factors, including the size and nature of the project and whether it is done in a residential area or a commercial space. Residential projects like bathroom plumbing, installing showers, bathtubs and sinks often require permits, while projects like replacing water lines, plumbing repairs on sewer lines or completing an entire remodel may also require permits. On the other side of the argument, there are some tasks that deem a permit unnecessary. Projects that involve simple repair jobs with pre-existing pipelines permitted by law, such as fixing leaking pipes, replacing faucet taps, emergency plumbing, or repairing toilet leaks, typically do not require permits. Additionally, tasks related to leak detection and pipeline inspections are not subject to permit requirements either. In conclusion, when it comes to plumbing permits in Arvada, you’ll need to factor in what type of project you’re doing and where it is taking place before deciding if you’ll need a permit from your city hall. Whether you’re working on residential projects or larger-scale remodels, getting the right information upfront is important so you can purchase the right items and receive permission when applicable. Now let's turn our attention to learning more about residential plumbing projects in Arvada and understanding when they require permits as well.
  • According to the City of Arvada’s website, all plumbing work done in the city requires a valid permit.
  • Plumbing permits must be applied for at least 24 hours before the start of any plumbing work and must be filed with the Planning Department.
  • The City of Arvada requires licensed professionals to obtain commercial plumbing permits for all non-residential/commercial projects, regardless of the cost.

1) Residential Plumbing Projects

When it comes to residential plumbing projects, the answer is not as clear-cut as with some commercial projects. Depending on what state or county you are in, there may be different rules regarding when a permit is required, or if special permits are needed due to certain regulations. For example, if you replace a toilet in your home, typically you will not need a permit for this type of plumbing work. On the other hand, a more complicated task such as replacing piping within your home could require a permit. This could be due to certain zoning laws that govern the amount of wastewater, or even local ordinances and standards surrounding the size and material of the pipes in specific areas of the property. Ultimately, it is up to each individual homeowner to make sure they are following any and all regulations related to their particular project. If you need more clarification, always best practice is to reach out to the appropriate local authorities who can provide the best guidance on precisely what is required for your plumbing project.  

2) Commercial Plumbing Projects

Beyond residential projects, commercial plumbing projects also often require a permit in Arvada. The permits are needed to ensure that the plumbing is installed and maintained in accordance to the local building codes and safety regulations. While some states may have different regulations for commercial versus residential projects, the general requirements remain the same. In addition to an applicable permit for the project, these types of projects should also be posted with all relevant permits collected from appropriate agencies. From water heaters to sewage pumps and septic tanks, many commercial plumbing projects involve various components and require different permits. When installing or upgrading new fixtures or equipment, you must understand which permit you need for each component as failure to do so will lead to costly fines or delays in your project. For example, if a business is replacing its existing water heater but not upgrading to a larger one, it may only need a permit for any alterations they make to the surrounding system rather than one for the new water heater. Proper research and knowledge of applicable building codes can help save time and money when it comes to any commercial plumbing project in Arvada. It’s always advisable when starting a project like this to consult an experienced plumber who is well-versed in the area’s regulations, so that you can be sure your work is done correctly — and legally — right away! Doing so ensures that your project meets all required standards for quality assurance and safety; ultimately saving you from having to go back and make changes that could have been prevented with proper planning from the start. Thus, knowing when exactly a permit is required by Arvada's laws is essential for any commercial plumbing project. Also Read: How to Use a Drain Snake to Clear Clogged Sinks and Showers

When Do You Need a Plumbing Permit?

When it comes to residential and commercial plumbing projects, many local governments require that a plumbing permit be obtained before any work begins. Generally, any installation of new plumbing or alterations to existing plumbing will require a permit. Unexpected repairs often need to be attended to quickly in order to avoid further property damage, but it is still important to check with your city government’s permitting office if a permit is required for the proposed repair. In some jurisdictions, the scope of the job determines whether or not a permit is needed, such as if the job involves making large changes to a private home’s plumbing system, which would require a permit. Minor maintenance tasks may also not require a permit unless specified by the jurisdiction. Another factor to consider when deciding on whether or not you need a permit is how long the project will last- generally speaking, projects that take longer than one day to complete are likely to require a permit. Overall, it can be difficult for those outside of the construction industry to understand all of the complexities involved in determining when you need a plumbing permit and what kind of paperwork is necessary for obtaining one. In this regard, it is always best practice to contact your local government's permitting office for advice before beginning any major alteration or additional work. Asking questions upfront can save you time and money in the long run, by helping ensure that all necessary paperwork has been properly taken care of ahead of time. Let's review some of the considerations before work even begins.

1) Before Beginning Work

Once you have verified that you require a plumbing permit, it is important to understand the process of applying for and obtaining a permit before beginning any work. Depending on your local jurisdiction, the requirements for permits may vary. Nevertheless, some critical steps are common across jurisdictions. When you apply for a permit, you should be prepared to submit paperwork detailing the scope of the project and any required documents from contractors or subcontractors. You may also need to provide diagrams or other details regarding the type of plumbing being installed. It is also important to provide detailed information regarding the types of materials and supplies used in the project. Once all the paperwork has been submitted and reviewed, you should expect a response within the allotted amount of time specified by your local jurisdiction. Although applying for a permit can seem like a tedious process, it is necessary to ensure safety and abide by local laws. Ignoring permit requirements could result in costly repairs and fines if violations are discovered during routine inspections by authorities. In extreme cases, individuals may be criminally charged and receive jail time if they do not comply with regulations related to plumbing permits. Before beginning any project involving a plumbing system – either new or existing – it is essential that you take all necessary steps to understand when a plumbing permit is needed and what needs to be done in order for one to be obtained. 

2) After Completion of Work

Once the work is completed, it is important to ensure that it has been done correctly and safely, as well as that all applicable building codes are met. A qualified inspector may need to be brought in to certify that the project has been done properly. Depending on the nature of the plumbing project, local codes may require that a licensed plumber or contractor inspect the installation before a final permit is obtained. If this is the case, then contact information for such an individual should be included when submitting paperwork for an inspection. After any necessary inspections have taken place and it is verified that everything was done according to local regulations, you will need to obtain a final permit. This is often referred to as a Certificate of Occupancy and it confirms that the project meets all required building codes and can be safely inhabited or used by members of the public. Without this final permit, your plumbing project will not be considered complete under Arvada’s laws and regulations. Securing a Certificate of Occupancy for your completed plumbing work is generally the last step in the process, but does involve a bit more paperwork on your part. The next section will discuss what you need to do in order to obtain this important certificate. Also Read: What to do when the Drains are Backed Up

Obtaining a Plumbing Permit in Arvada

Obtaining a plumbing permit in Arvada can be an arduous process, depending on your particular circumstances. Depending on the size and scope of the project, you may need to submit multiple documents to the municipality or county. You may also need to pay a fee in order to obtain the permit. In general, the application process for a plumbing permit in Arvada involves submitting plans and specifications of the proposed project, providing contact information for developers, verifying contractor licensure and documentation, and providing any necessary drawings or diagrams. In some cases, notably when the plumbing permit is intended for large-scale projects such as apartment complexes or commercial buildings, it can be beneficial to hire an experienced professional who understands local regulations and has knowledge of how to navigate the permitting process. Companies such as contractors, plumbers, engineers, architects, and surveyors can help to ensure that all paperwork is complete and proper fees are paid for projects requiring a plumbing permit. On the other hand, there are those who argue that obtaining permits in Arvada should not be so difficult. They point out that in many instances, locals don't need to go through a complicated application process – they only have to provide basic information regarding the project in question and then wait for approval from the council or other governing body. Moreover, they suggest that with modern technology, such as online applications or apps, it could be easier to submit an application without needing help from an experienced professional.
How to Stop a Running Toilet and Fix Common Flush Problems

How to Stop a Running Toilet and Troubleshoot Flush Errors?

Let's face it, a running toilet can be incredibly frustrating. On one hand, it eats up the water bill, yet on the other, it's hard to determine where the exact problem lies. While there are many possible causes of a running toilet, most of them can be fixed without investing in a professional plumber. In this blog post, we're going to delve into common flush problems and provide easy-to-follow steps on how to stop a running toilet in Arvada. Here, you'll learn specific at home troubleshooting tips and tricks, as well as receive a comprehensive look at when it might be time to call in a professional. So without further ado, we'll jump right in and get you well on your way to restoring peace, tranquility, and an end to your running toilet woes. Also Read: Do you need a plumber for bathroom remodeling services?

Diagnosing Your Running Toilet Issues in Arvada

When it comes to diagnosing the cause of a running toilet in Arvada, there are two main directions to look. It could be a problem related to the fill valve or the flush mechanism. In either case, diagnosing your toilet issues can help you decide the best method for repair or replacement. In terms of fill valves, a simple test is to unplug and remove the float attached to it. If this doesn't stop the flow, then it could be an issue with the flapper being worn out, an obstruction in the drain pipe, or a bent lever arm (known as a trip level). If it stops on its own, then the fill valve needs to be repaired. One thing worth noting is that adjusting the water level yourself won’t fix a defective fill valve, so it is important to diagnose these types of issues properly. For flush mechanisms, check for any obstructions inside the bowl, such as hard water deposits or clogged waste that's preventing the complete emptying of water into the drain line. You may also need to inspect and clean the pump and/or diaphragm assembly and view any corrosion on linkage rods. Once any problems have been identified, you can make decisions about buying parts and/or replacing components if they're beyond repair. Understanding what is wrong with your running toilet after a proper diagnosis is key to getting it fixed properly without creating more issues in the future. With an understanding of what can go wrong with your particular model, you can now move onto common flush problem fixes that might apply to your situation. Also Read: How do you find a hidden water leak?

Common Flush Problems & their Fixes

Now that you’ve gone through the steps for diagnosing your toilet issues in Arvada, it’s time to address some of the common flush problems and their fixes. Generally speaking, running toilets are caused by a worn out flapper valve or a faulty fill valve. Depending on what issue you’ve identified, the required repair might vary. When it comes to flapper valves, consider replacing the entire assembly in order to prevent any future problems. Moreover, once you remove the flapper and inspect for damage, you should install a new one that is specifically designed for your particular toilet model. On the other hand, if it turns out that the fill valve needs repairing or replacing, make sure to adjust its height as prescribed in any manual accompanying it. In addition, there could be an issue with your water level being too low or too high, in which case you need to replace or adjust the float system accordingly. In some cases, this solution might even save you from having to buy a new part altogether, since there’s a chance that your system was simply misaligned. To conclude this section on common flush problems and their fixes – ensure that whatever solution you go with is tailored towards the specific problem that your toilet is dealing with at present. Finally, now that we’ve discussed how to diagnose and address common flush issues in Arvada, it’s time to discuss something else – installation of Stopper & Flapper Valve Combo Repair Kits. These kits have proven to be successful at resolving multiple types of toilet issues at once and will certainly not hurt those looking for comprehensive solutions for their plumbing woes.

1) Stopper & Flapper Valve Combo Repair Kit Installation

The Stopper & Flapper Valve Combo Repair Kit installation is a great option when you’re looking to fix your running toilet. This handy and relatively simple repair kit can be installed within minutes. The complete kit comes with an adjustable stopper and flapper valve, allowing the water level in the bowl to stay consistent. With this all-in-one, adjustable solution there is no need to purchase different components like flappers and stoppers separately. This saves time as everything required for installation is included in one kit. When installing the kit, make sure that the downward adjustments of both parts (i.e. stopper and flapper) are sufficient so that enough water remains in the bowl after each flush. If their angle is incorrect, the toilet can continue running or overflows may occur. Additionally, either the stopper or flapper should seal fully while they close to prevent water from leaking into the drainpipe system and causing any leaks down the line. It's also important to periodically check if parts seem loose or worn in order to ensure that all components are working correctly afterwards. In order to fix a running toilet, it's essential to properly install the Stopper & Flapper Valve Combo Repair Kit and make selections on their settings based on what would work best for your particular situation. With that being said, it's time now to transition from the common flush problems and move onto understanding how to identify and handle leaks in the drain pipe and its assembly.
  • According to the US Environmental Protection Agency, approximately 19,000 gallons of water are wasted each year due to running toilets.
  • Research by Home Advisor estimates that poor flushing performance and running toilets caused by worn flapper valves account for more than four hundred million dollars in water bills in the United States every year.
  • The City of Arvada reports that the most common cause of a running toilet is an old, worn out wax-ring seal at the base of the toilet's pipe.

2) Leaks from the Drainpipe & Drain Assembly

Leaking from the drainpipes or drain assembly is another common issue that can arise with a running toilet. There are two solutions to this issue: replacing the drainpipe/drain assembly or applying a sealant if it's a minor leak. In most cases, replacing the drains would be the best course of action as it is the most effective and longer-lasting solution. In order to replace them, you have to begin by loosening fittings and flanges, then separating the tank from the bowl before removing the old pipe and assembly. It is best to use plumber’s tape before connecting the new components to prevent leaking. Afterward, remember to properly connect the water line back into the tank before reattaching it to the bowl. On that note, if it is only a minor leak and you are looking for a quicker fix, then you can attempt to address it with a sealant such as silicone waterproof caulk or compression plumbing wax putty. If going this route, make sure that either product is specifically labeled for use on plumbing fixtures since other types of sealants won’t necessarily work as effectively here. You will then need to follow directions throughly — which vary per sealant — in order to guarantee successful sealing. Whichever method you choose, remember that in both cases they should stop any leakage from occurring after installation/application is complete. Having discussed how to stop leaks from the drainpipe/drain assembly of your Arvada toilet, let us now turn our attention towards modifying its flushometer pressure settings -- necessary for ensuring maximum efficiency and proper functioning when flushing. Also Read: How to find water shut-off valve?

Flushometer & Pressure Adjustment Screw Resetting

The next step if you have a running toilet is to check the flushometer and pressure adjustment screw. If your toilet has a flushometer, it may need to be reset. Try pushing down on the handle for 10 seconds, then release and observe if it continues to run. If so, you can turn the water off at the shut-off valve located behind or under the toilet tank, then press and hold the knob for 30 seconds. This should reset the mechanism and bring it back to its factory settings. If your toilet has a pressure adjustment screw, try moving it clockwise in 1/4 inch increments until it stops running. This method works by increasing water pressure in the tank and using more force to push water into the bowl. Once you find the sweet spot where it's not running too low or too high, leave it there. Whether you use a flushometer or pressure adjustment screw (or both) to reset your toilet & fix common flush problems in Arvada, it is best practice to always check for leaks from the drainpipe & drain assembly after making adjustments. To check for leaks, perform a test flush with food coloring in the tank; if color appears in the bowl before flushing is complete (or after several flushes), this could indicate a defective seal around the pipe joints & an immediate repair will be required. Also keep an eye out for slow draining after flushing as again this could signal a defective seal that needs replacing or refitting. Make sure your fixtures are provided with backwater protection such as an air admittance valve or floor drains to reduce any risk of sewer backups; this is especially important if your house is on a lower elevation than any public sanitary sewers nearby as sewage can back up into your house due to gravity. Additionally, using pipes as large as possible also helps reduce clogs since they provide more surface area inside which will allow water to move faster through them. Lastly, having all of your system connected properly – from supply lines & valves all the way down through drainage pipes & connections- can increase efficiency and help prevent future clogs or line breaks or other potential issues down the road that might be caused by incorrect installation or incorrect parts being used.